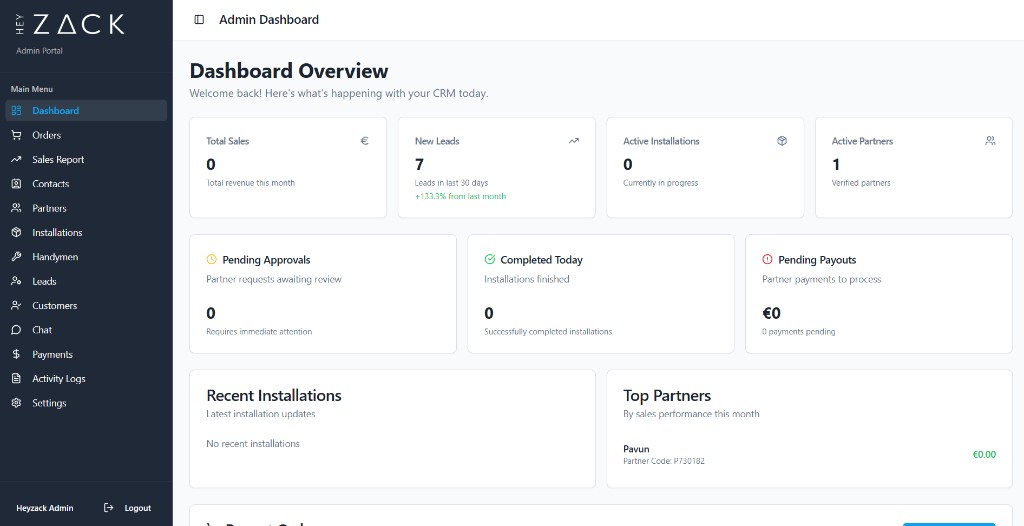
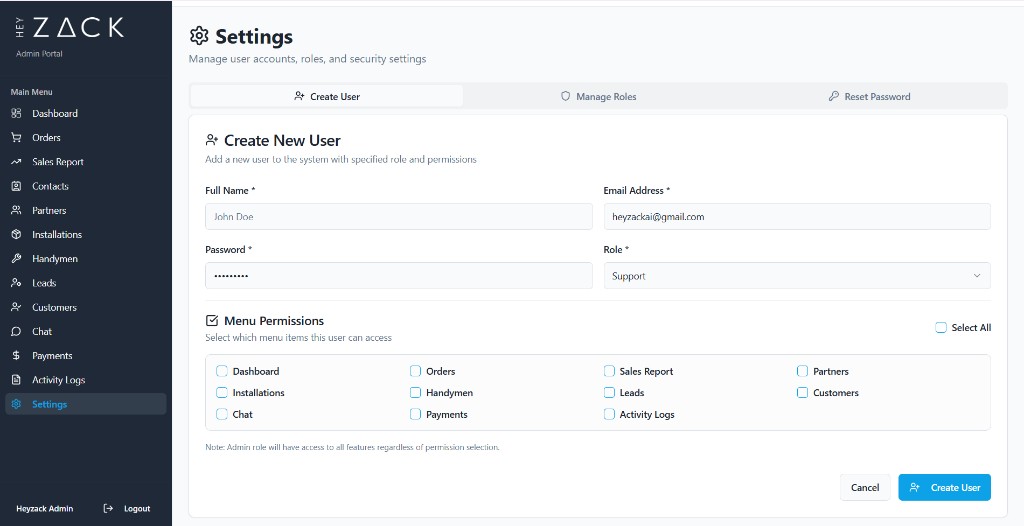
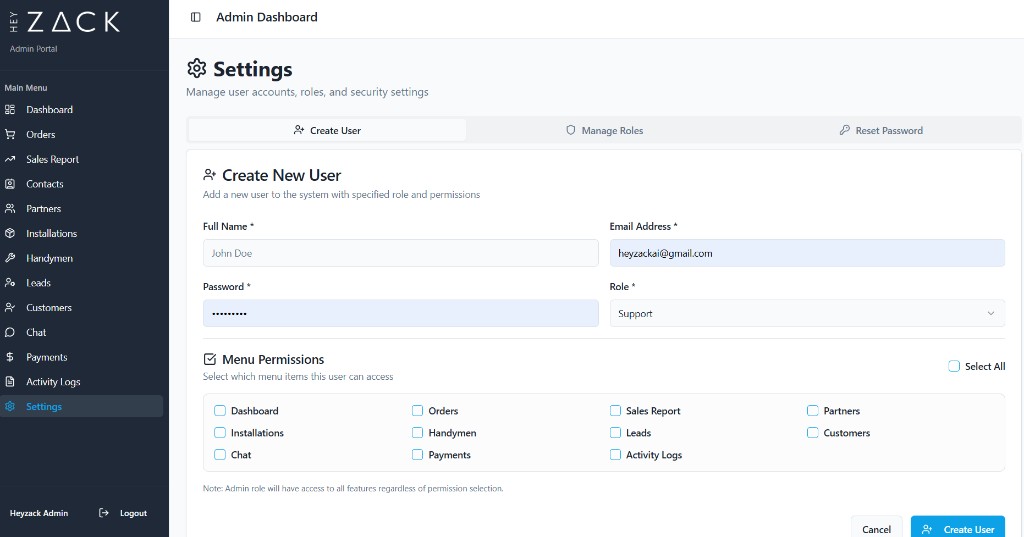
# HeyZack Partner Portal
> Documentation for the HeyZack Partner Portal smart home operations platform.
This document contains the full content of all documentation pages for AI consumption.
---
## Partner Portal documentation
## Sign in, reset, and manage your Partner Portal account
**URL:** https://docs.heyzack.ai/docs/authentication
**Description:** How to sign in to the HeyZack Partner Portal, reset a forgotten password, set a permanent password on first login, and manage your account security.
The HeyZack Partner Portal uses email and password authentication. This page covers everything related to accessing your account: signing in, recovering a forgotten password, setting your permanent password on first login, and understanding common sign-in errors.
## Sign in with email and password
## Reset your password on first login
When HeyZack creates your account, you receive a temporary password. The portal detects this on your first sign-in and prompts you to set a permanent password before you can access the dashboard.
## Forgot your password
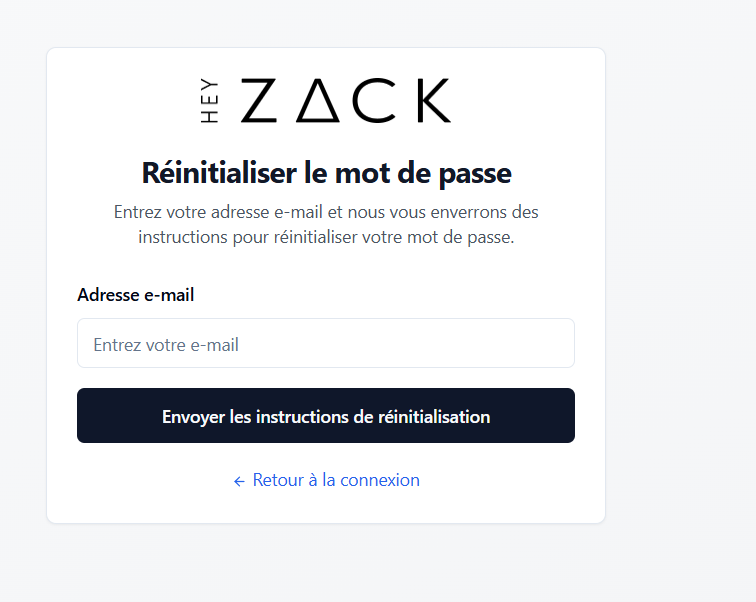
If you can't remember your password, you can request a reset link from the sign-in page.
## Change your password from Settings
If you're already signed in and want to update your password, you can do this from your account settings without going through the forgot-password flow.
1. Click **Settings** in the sidebar.
2. In the **Security** section, click **Change Password**.
3. Enter your current password, then enter and confirm your new password.
4. Click **Save changes**.
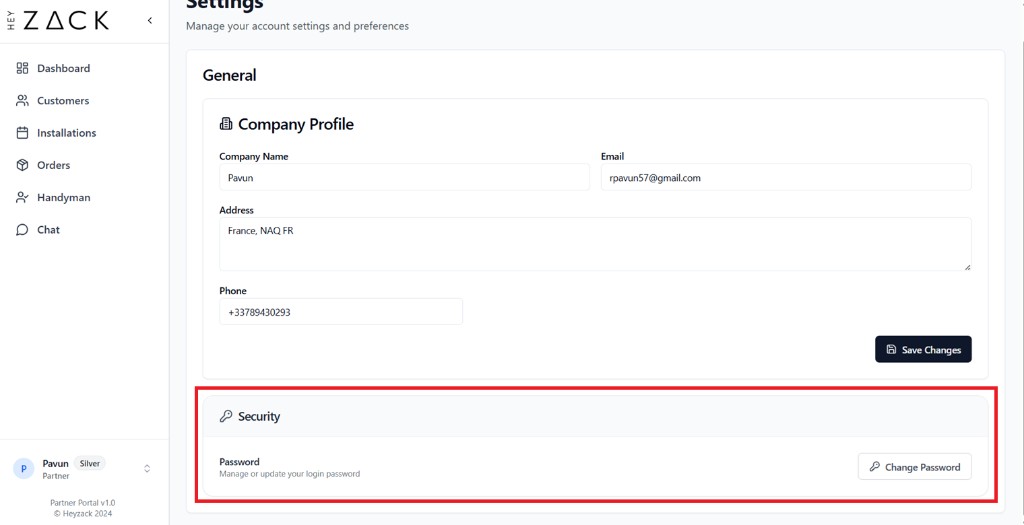
Your new password takes effect immediately. Use it the next time you sign in.
## Common authentication errors
| Error | What it means | What to do |
|---|---|---|
| Invalid credentials | Your email or password is incorrect. | Double-check both fields. Use **Forgot password** if you've forgotten your password. |
| Email address not found | No account exists for the email you entered on the Forgot Password page. | Check for typos, or contact your HeyZack account manager if you're unsure which email is registered. |
| Too many requests | You've submitted the forgot-password form too many times in a short period. | Wait a few minutes before trying again. |
| Invalid or expired reset link | The password reset link you clicked has already been used or has expired. | Return to the Forgot Password page and request a new link. |
| Network error | The portal couldn't reach the authentication server. | Check your internet connection and try again. |
## Getting help
If you're locked out and none of the above steps resolve the issue, contact your HeyZack account manager. They can verify your account status and assist with access.
---
## HeyZack Partner Portal: Smart Home Operations Hub
**URL:** https://docs.heyzack.ai/docs
**Description:** HeyZack Partner Portal helps authorized smart home installers manage customers, installations, and handymen from a single dashboard.
The HeyZack Partner Portal is your central command center for running a smart home installation business. As an authorized HeyZack partner, you get a purpose-built operations platform that covers every step of your workflow - from the first customer inquiry through completed installation and ongoing support.
## What you can do with the Partner Portal
The portal brings together all the tools you need to run profitable smart home installation operations:
- **Customer records** - maintain complete customer profiles with contact details and full installation history
- **Installation management** - schedule jobs, assign handymen, and track each installation through every status step
- **Team management** - register handymen, monitor availability, and communicate directly through the portal
- **Inventory ordering** - browse and order smart home devices via the integrated Shopify storefront and track your deliveries
- **Partner rewards** - earn tier upgrades and credits as your monthly revenue grows; apply credits to future orders
- **Reports** - access financial, installation, and customer satisfaction reports to understand your business performance
## How the portal works
---
## HeyZack Partner Portal: Smart Home Operations Hub
**URL:** https://docs.heyzack.ai/docs/introduction
**Description:** HeyZack Partner Portal helps authorized smart home installers manage customers, installations, and handymen from a single dashboard.
The HeyZack Partner Portal is your central command center for running a smart home installation business. As an authorized HeyZack partner, you get a purpose-built operations platform that covers every step of your workflow — from the first customer inquiry through completed installation and ongoing support.
## What you can do with the Partner Portal
The portal brings together all the tools you need to run profitable smart home installation operations:
- **Customer records** — maintain complete customer profiles with contact details and full installation history
- **Installation management** — schedule jobs, assign handymen, and track each installation through every status step
- **Team management** — register handymen, monitor availability, and communicate directly through the portal
- **Inventory ordering** — browse and order smart home devices via the integrated Shopify storefront and track your deliveries
- **Partner rewards** — earn tier upgrades and credits as your monthly revenue grows; apply credits to future orders
- **Reports** — access financial, installation, and customer satisfaction reports to understand your business performance
## How the portal works
---
## Get started with the HeyZack Partner Portal
**URL:** https://docs.heyzack.ai/docs/quickstart
**Description:** Learn how to sign in to the HeyZack Partner Portal and get oriented with your dashboard and key sections.
The HeyZack Partner Portal gives you everything you need to run your smart home installation business in one place. This guide walks you through signing in for the first time and completing the core workflow so you can start managing real jobs straight away.
## Sign in to the portal
## What you see when you first log in
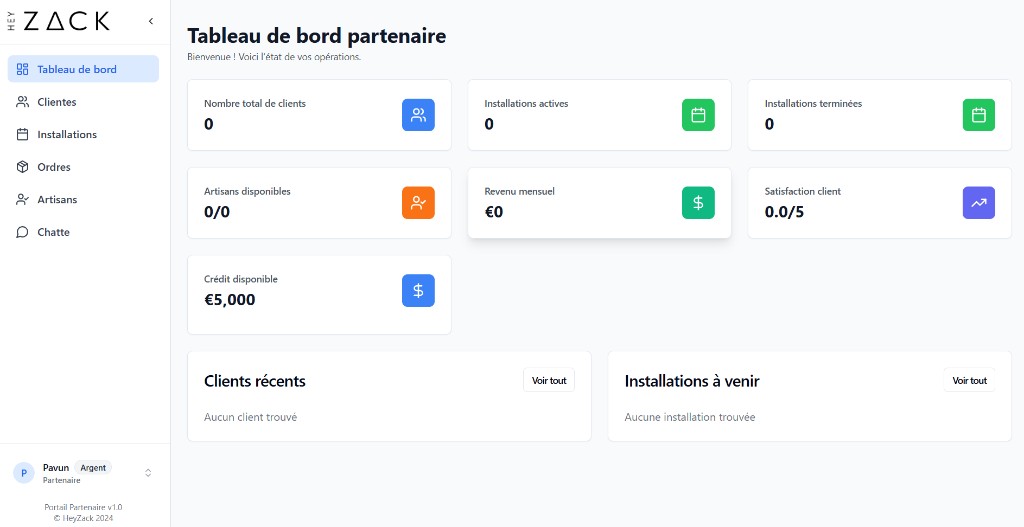
After signing in, you land on the **Dashboard** — your operational overview for the day. Here's what you'll find:
The left sidebar gives you access to every section of the portal: **Customers**, **Installations**, **Handymen**, **Inventory**, **Reports**, and **Settings**.
## What to do next
Now that you've completed your first workflow, explore the rest of the portal:
---
## View customer records and installation history
**URL:** https://docs.heyzack.ai/docs/customers/managing-customers
**Description:** How to open customer records, review full contact details, inspect timelines, and track installation history.
Use the **Customers** section to open existing customer records and review everything linked to each account, including contact information, activity timeline, and installation history.
## Open a customer record
## View customer details
Click anywhere on a customer's row in list view, or click the **View** button, to open the customer detail page. This page is divided into four tabs:
## View a customer's installation history
Open the customer detail page and select the **Installations** tab. Each installation entry shows:
- **Title** — the name of the installation job
- **Status** — the current stage of the installation (for example, Scheduled, Started, or Completed)
- **Scheduled date** — when the job is planned
- **Completion photos** — thumbnails of photos uploaded at job completion; click any thumbnail to open the full-size image viewer
## Customer statuses
A customer's status reflects their current relationship with your business:
| Status | Meaning |
|---|---|
| **Active** | The customer has an open or recently completed engagement. |
| **Inactive** | The customer's engagement has ended or been paused. Inactive records remain in your database and can be searched or reactivated. |
## Search and pagination
The search bar on the Customers page matches against name, email, and phone number simultaneously. Filtered results respect the current status filter if one is applied.
The list displays **10 customers per page**. Use the **Previous** and **Next** buttons — or click a specific page number — to move through the full dataset. If you search or change filters while on a later page, the view resets to page 1 so you always see the most relevant results first.
---
## Customer records in the HeyZack Partner Portal
**URL:** https://docs.heyzack.ai/docs/customers/overview
**Description:** Learn what customer records contain, how to browse and filter your customer list, and how to navigate from records to full installation history.
Customer records are the permanent home for everything you know about each person you serve. Every customer tied to your partner account lives on the **Customers** page, where you can search across your entire database, filter by status, and open any record to see full contact details alongside that customer's complete installation history.
## What a customer record contains
Each customer record stores the following information:
| Field | Description |
|---|---|
| **Name** | The customer's full name |
| **Email** | Primary email address |
| **Phone** | Contact phone number |
| **Address** | Service address for installations |
| **Status** | Whether the customer is active or inactive |
| **Installations** | All installation jobs linked to this customer |
## Browsing your customers
The Customers page opens in **list view** by default. Each row shows the customer's name, email, phone, and address at a glance. A badge on each row indicates how many installations are associated with that customer.
The portal also supports a **grid (card) view** that organizes customers into columns by status, making it easy to see how your customer base breaks down at a glance.
## Customer statuses
Every customer record has one of two statuses:
## Searching and filtering
Use the search bar at the top of the Customers page to find any customer by name, email, or phone number. Results update as you type, so you can locate a record without knowing the exact spelling.
When you are in list view, you can also apply a **status filter** to narrow the list to active or inactive customers only. Combine search and filter together to zero in on a specific subset of your customer base.
## Next steps
Once you have found the customer you are looking for, you can open full contact details and review installation history.
---
## Understanding your dashboard KPIs and metrics
**URL:** https://docs.heyzack.ai/docs/dashboard/kpis
**Description:** A breakdown of each KPI card on your dashboard — what it measures, how it is calculated, and what to do when a number looks off.
Your dashboard displays seven KPI cards that give you an instant read on the key dimensions of your business. This page explains what each metric represents, where the data comes from, and how the value is formatted so you know exactly what you are looking at.
## Total Customers
**What it shows:** The total number of customers registered in your partner account.
This count includes every customer record in your account regardless of their status (active or inactive). It is fetched from your customer database and reflects the total at the time the page loaded.
## Active Installations
**What it shows:** The total number of installation jobs recorded in the system.
This is a count of all installations linked to your account, across all statuses. It gives you a sense of total job volume rather than only jobs currently in progress.
## Completed Installations
**What it shows:** The number of installations that have been approved by the customer.
An installation is counted as completed only when its status reaches **Customer Approved** — the final stage where the customer confirms the work was carried out to their satisfaction. It is the most reliable signal that a job is fully closed.
## Available Handymen
**What it shows:** Your technician availability as a ratio — available technicians out of your total roster.
The format is `available/total`. For example, `3/5` means three of your five technicians are currently available to take jobs. A technician is counted as available when their availability status is set to **Available**.
## Monthly Revenue
**What it shows:** Your total revenue for the current month, displayed in EUR.
This value is pulled from your partner tier information and reflects the sales volume your account has generated in the current billing month. It is formatted as a whole-number EUR amount (for example, `€4,200`).
Monthly Revenue is also the primary input used to calculate your partner tier and progress toward the next tier. See [Partner tiers: benefits, revenue thresholds, and credits](/dashboard/partner-tier) for more detail on how revenue thresholds determine your tier.
## Customer Satisfaction
**What it shows:** The average customer rating across all rated installations, expressed as a score out of 5.
Ratings are collected from customers after their installations reach `CUSTOMER_APPROVED` status. The average is calculated across all rated installations in your account. The card displays the value to one decimal place — for example, `4.3/5`.
If no ratings have been collected yet, the card displays `N/A`.
## Available Credit
**What it shows:** Your current partner credit balance in EUR, which you can apply to Shopify orders.
Partner credits are earned through the HeyZack partner program based on your tier and sales performance. The balance shown is the credit available to use right now. It is denominated in EUR and formatted as a whole-number currency value.
When your balance is greater than zero, you can use the **Use Credit** action on this card to apply your credits toward an order. See [Partner tiers: benefits, revenue thresholds, and credits](/dashboard/partner-tier) for a full walkthrough of how to apply credits.
---
## Partner Portal dashboard: your operations at a glance
**URL:** https://docs.heyzack.ai/docs/dashboard/overview
**Description:** The dashboard shows live KPI cards, upcoming installations, and recent customers so you can monitor your business and act without navigating multiple sections.
The dashboard is the first page you see after signing in. It brings together the most important data from across your partner account so you can monitor your business health and act quickly without navigating to multiple sections. Every metric on this page refreshes automatically when the page loads.
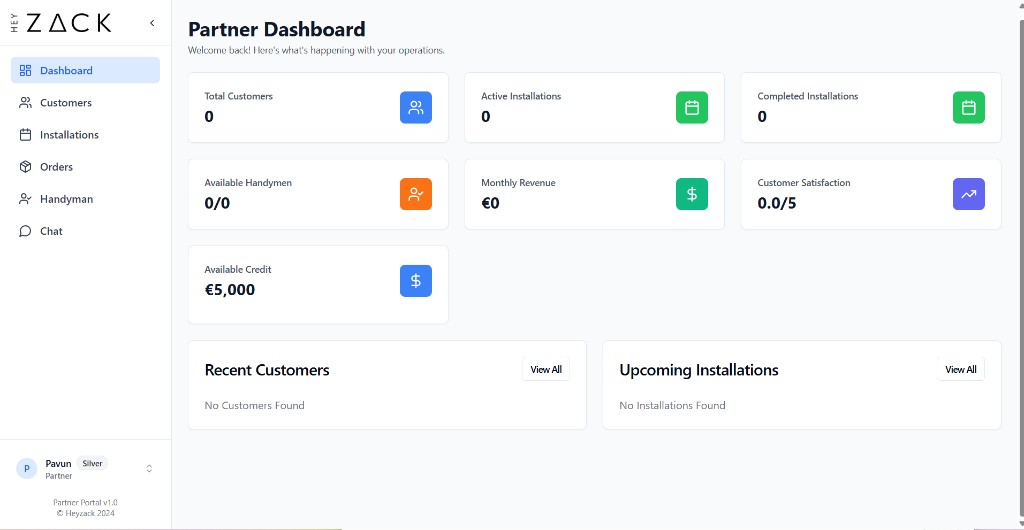
## What the dashboard shows
The dashboard is organised into three areas: a row of KPI cards at the top, followed by two side-by-side widgets that show your most recent customers and upcoming installations.
## KPI cards
The top section displays seven KPI cards arranged in a responsive grid. Each card shows a single metric with its current value. See [Understanding your dashboard KPIs](/dashboard/kpis) for a full explanation of what each metric measures and how it is calculated.
The seven cards are:
| Card | What it shows |
|---|---|
| Total Customers | Total number of customers in your account |
| Active Installations | Total installations recorded in the system |
| Completed Installations | Installations that customers have formally approved |
| Available Handymen | Available technicians out of your total roster |
| Monthly Revenue | Your revenue for the current month in EUR |
| Customer Satisfaction | Average customer rating out of 5 |
| Available Credit | Your earned partner credits balance in EUR |
## Recent customers widget
The **Recent Customers** widget lists the five most recently added customers in your account. For each customer you can see:
- Customer name
- Email address or phone number
- Account status (active or inactive)
- The date the customer was added
Select **View All** to go directly to the full Customers section.
## Upcoming installations widget
The **Today's Installations** widget shows the next five scheduled installations, ordered by the earliest scheduled date. For each entry you can see:
- Customer name and address
- Scheduled date
- Assigned technician name
Select **View All** to open the full Installations section where you can manage scheduling and status updates.
## Navigating from the dashboard
The dashboard is a starting point, not a destination. Use it to spot anything that needs attention, then follow the links below to act on it.
---
## Partner tiers: benefits, revenue thresholds, and credits
**URL:** https://docs.heyzack.ai/docs/dashboard/partner-tier
**Description:** How the HeyZack partner tier system works — tier thresholds, discount and MDF rates, partner credits, and how to apply credits to a Shopify order.
HeyZack uses a tiered partner program to reward partners who grow their business on the platform. Your tier is determined by your monthly revenue, and higher tiers unlock better discount rates, marketing development funds (MDF), and other benefits. You can track your current tier and progress directly from the dashboard.
## How tiers work
Your tier is calculated automatically based on your monthly revenue. As your sales volume grows and crosses a tier threshold, your account is upgraded. The upgrade timestamp is recorded so you can see when you last moved tiers.
Each tier has four defining properties:
| Property | Description |
|---|---|
| **Tier name** | The name of the tier (for example, Silver, Gold, Platinum) |
| **Threshold** | The minimum monthly revenue in EUR required to hold this tier |
| **Discount rate** | The product discount percentage available to you at this tier |
| **MDF rate** | The marketing development fund rate available at this tier |
| **Benefits** | A list of additional perks and program access unlocked at this tier |
## Tracking your tier on the dashboard
Your dashboard KPI cards show your **Monthly Revenue** in real time, which is the primary input used to determine your tier. To understand where you stand relative to the next tier, you can look at the following values from your tier information:
- **Current tier** — the tier you hold right now
- **Next tier** — the name of the tier above yours, or empty if you are already at the highest tier
- **Sales to next tier** — the additional monthly revenue in EUR needed to reach the next tier
## Partner credit system
Partner credits are a monetary benefit you earn through the HeyZack partner program. Your credit balance is shown in EUR on the **Available Credit** KPI card on the dashboard.
Credits accumulate based on your tier and sales activity. Once earned, you can apply them directly toward purchases in the HeyZack Shopify store, reducing the amount you pay out of pocket.
## Applying credits to a Shopify order
You can apply your available credit balance to a Shopify order directly from the dashboard using the **Use Credit** dialog on the Available Credit card.
## Tier configuration reference
Each tier in the system is defined by the following fields. You can view the full tier configuration, including all available tiers and their thresholds, in your partner account settings.
---
## Track and view handyman availability schedules
**URL:** https://docs.heyzack.ai/docs/handymen/availability
**Description:** View a handyman's daily availability slots, understand status indicators, and see how job assignments affect their availability in real time.
Knowing when each handyman is free helps you assign installations without conflicts. The portal pulls each handyman's schedule automatically so you can see their available time slots at a glance — directly from the handyman table or via their detailed profile.
## Availability status indicators
Every handyman carries one of four availability statuses, visible as a coloured badge in the **Availability** column of the table:
## View a handyman's daily schedule
Each row in the handyman table includes a **View availability** link directly below the status badge. Clicking it opens the handyman's profile modal with the **Availability** tab pre-selected.
## How availability affects installation assignment
The portal uses a handyman's current availability status to guide job assignment decisions:
- Only handymen with **Available** status are shown as ideal candidates when you assign a new installation.
- When you assign a job to a handyman, their availability status changes to **Busy** automatically. Their current location field is also updated to reflect the job address.
- A handyman returns to **Available** once their jobs are resolved — either completed or cancelled.
## Understanding time slots
Each available day can have one or more time slots, each defined by a start time and an end time. Time slots represent the windows when the handyman has indicated they can accept work.
## Related pages
- [Manage your handyman team in the Partner Portal](/handymen/overview)
- [Send messages to handymen directly from the portal](/handymen/messaging)
---
## Send messages to handymen directly from the portal
**URL:** https://docs.heyzack.ai/docs/handymen/messaging
**Description:** Use the built-in messaging modal to send text messages and images to any handyman in your team, without leaving the Partner Portal.
The Partner Portal includes a built-in messaging feature that lets you communicate directly with handymen from within the platform. You can send job instructions, share reference images, and confirm schedules — all without switching to a separate messaging app.
## Open the messaging modal
## Send a text message
## Send an image
You can attach a photo or document image to your message — useful for sending site photos, product references, or installation diagrams.
## Common use cases
## Message history
Every conversation is persisted. When you re-open the messaging modal for the same handyman, the full thread loads automatically from the top. Messages are displayed in chronological order with timestamps showing either the time (for messages sent today) or the date and time (for older messages).
## Related pages
- [Manage your handyman team in the Partner Portal](/handymen/overview)
- [Track and view handyman availability schedules](/handymen/availability)
---
## Manage your handyman team in the Partner Portal
**URL:** https://docs.heyzack.ai/docs/handymen/overview
**Description:** Add, search, filter, and remove handymen linked to your partner account, and view their skills, availability, and verification status.
The Handymen page gives you a central place to manage every technician linked to your partner account. From here you can register new handymen, browse their profiles, monitor their current availability, send messages, and remove anyone who is no longer working with you — all without leaving the portal.
## What a handyman record contains
Each handyman profile stores the following information:
| Field | Description |
|---|---|
| **Name** | The handyman's full display name. |
| **Contact number** | Phone number used for communication. |
| **Address / current location** | The handyman's current operating location. |
| **Skills** | A list of specialisations, such as Plumbing, Electrical, or Carpentry. |
| **Availability status** | Whether the handyman is Available, Busy, or On Leave. |
| **Rating** | A numeric score reflecting past job performance. |
| **Verification status** | Whether your team has reviewed and approved the handyman's KYC document. |
## Summary statistics
At the top of the Handymen page, four stat cards give you an instant snapshot of your team:
- **Total** — the total number of handymen linked to your account.
- **Available** — handymen whose status is currently Available (shown in green).
- **Busy** — handymen currently assigned to an active job (shown in yellow).
- **On Leave** — handymen who are temporarily unavailable (shown in red).
- **Avg Rating** — the sum of ratings across all linked handymen.
## Searching and filtering
Use the controls above the handyman table to narrow down the list:
- **Search bar** — type a handyman's name or skill to filter results in real time.
- **Status filter** — select a specific availability status (Available, Busy, On Leave, or Pending Registration) to show only handymen in that state.
- **Skill filter** — pick a skill from the dropdown to display only handymen who have that skill listed on their profile.
You can combine search and filter at the same time. The table header shows how many results match the current criteria.
## The handyman table
The main table lists your handymen 10 per page with the following columns:
| Column | What it shows |
|---|---|
| **Name** | Avatar, full name, and Verified label if applicable. |
| **Contact** | Phone number linked to the record. |
| **Address** | Current operating location. |
| **Availability** | Status badge and a **View availability** link. |
| **Profile** | Eye icon button — opens the full profile modal. |
| **Message** | Chat bubble icon button — opens the messaging modal. |
| **Actions** | Trash icon button — removes the handyman from your account. |
Click anywhere on a row to open the handyman's full profile. Use the pagination controls at the bottom of the card to move between pages.
## Register a new handyman
## View a handyman's full profile
Click the eye icon in the **Profile** column, or click anywhere on the handyman's row, to open the details modal. The modal has three tabs:
- **Details** — contact info, location, skills, KYC document, and verification controls.
- **Availability** — a day-by-day schedule showing available time slots. See [Track and view handyman availability schedules](/handymen/availability) for more detail.
- **Installations** — a list of installations assigned to this handyman, with status badges and scheduled dates.
## Delink a handyman
To remove a handyman from your account:
## Related pages
- [Track and view handyman availability schedules](/handymen/availability)
- [Send messages to handymen directly from the portal](/handymen/messaging)
---
## Assign and reassign handymen to installation jobs
**URL:** https://docs.heyzack.ai/docs/installations/handyman-assignment
**Description:** Assign a verified handyman to an open installation, reassign when plans change, and understand how assignment affects the installation status.
Every installation needs a handyman before work can begin on site. You can assign a handyman when you first schedule the installation, or come back to the installation list and assign one later. If plans change after an assignment is already in place, you can reassign the job to a different person — provided the installation is still in an active state.
## When you can assign or reassign
The assignment controls appear on an installation row based on the current situation:
| Situation | Button shown |
|---|---|
| No handyman assigned and status is not Cancelled or Rejected | **Assign** |
| Handyman already assigned and status is Installer Assigned or En Route | **Reassign** |
| Status is Cancelled or Rejected | No assignment button — assignment is locked |
## Assign a handyman
## Reassign a handyman
You can reassign a job as long as the installation status is **Installer Assigned** or **En Route**. Once the installation moves further along the workflow, the reassign option is no longer available.
## What happens after assignment
When a handyman is successfully assigned, the installation status changes to **Installer Assigned**. This moves the installation into the **Scheduled** status group on the overview cards and in the status filter.
From that point, the handyman drives further status updates as they travel to the site and carry out the work:
1. The status moves to **En Route** when the handyman is traveling to the customer's address.
2. Once on site, the status advances through the **In Progress** group as work progresses and contract steps are completed.
3. After the customer signs off, the installation reaches **Customer Approved** status.
See the [installation statuses reference](/installations/statuses) for the full list of statuses and their meanings.
## The handyman assignment modal
The assignment modal has two screens depending on your selection.
---
## Installation management in the Partner Portal
**URL:** https://docs.heyzack.ai/docs/installations/overview
**Description:** View, search, and manage every smart home installation your business handles — from scheduling through customer approval — in one place.
The Installations section of the Partner Portal gives you a complete picture of every job your business has scheduled or completed. Each installation record captures the customer, the assigned handyman, the scheduled date, the current status, any notes, and the customer's address. You can browse jobs in a list or jump to a calendar to see what's happening day by day.
## What an installation record contains
Every installation record holds the following information:
| Field | Description |
|---|---|
| **Customer** | The customer's name, email, phone number, and service address |
| **Handyman** | The team member assigned to carry out the job |
| **Scheduled date** | The date and time the installation is booked for |
| **Status** | The current stage of the installation in the workflow |
| **Notes** | Internal notes added by you or your team throughout the job |
| **Address** | The site address pulled from the customer record |
## Status overview cards
At the top of the Installations page, a row of summary cards lets you see your workload at a glance. Each card shows a count for one status group:
- **Total** — every installation in your account
- **Scheduled** — jobs that are booked but the handyman has not yet departed
- **En Route** — handyman is on the way to the site
- **In Progress** — active installation work, including contract steps
- **Approved** — customer has approved the completed work
- **Rejected** — installations that were cancelled or rejected
Clicking a card does not filter the list. Use the status dropdown in the filter bar to narrow the list to a specific group.
## Two ways to view your installations
## Search and filter
Use the controls in the filter bar to find specific installations:
- **Search** — type any part of a customer name, handyman name, or installation title to narrow the list in real time
- **Status filter** — select a status group (Scheduled, En Route, In Progress, Approved, or Rejected) from the dropdown to show only jobs in that stage
- **Date range** — open the date picker to set a start and end date; only installations with a scheduled date within that range will appear
## Next steps
---
## Schedule smart home installations for your customers
**URL:** https://docs.heyzack.ai/docs/installations/scheduling
**Description:** Book a new installation, set the date and time, add notes, and optionally assign a handyman — all from the Schedule Installation form.
When a customer is ready to proceed, you create an installation record in the Partner Portal to lock in the date and kick off the job workflow. The scheduling form collects everything the system needs to track the job from start to finish. You can also reschedule a job later if the date needs to change, or reject a job that cannot go ahead.
## Schedule a new installation
## Calendar view
After you schedule installations, switch to the **Calendar** view to see how your jobs are spread across the month. The calendar highlights dates that have at least one installation scheduled, using color-coded indicators that reflect each day's most significant status.
You can switch between three calendar modes:
## Filter by date range in list view
In list view, you can narrow the list to a specific time period using the date range picker:
1. Click the **Filter by date** button in the filter bar.
2. Select a start date on the calendar. The date is highlighted.
3. Select an end date to complete the range, or leave it as a single date to show only installations scheduled on that day.
4. The list updates automatically to show only installations whose scheduled date falls within the range you selected.
To clear the date filter, reopen the picker and deselect the dates.
## Reschedule an installation
If a job needs to move to a different date, you can update the scheduled date directly from the installation detail page:
1. Click **View details** on the installation you want to reschedule.
2. On the detail page, find the scheduled date and select a new date from the calendar picker.
3. Confirm the new date. The installation record updates immediately and the change is reflected in both list and calendar view.
## Reject an installation
If an installation cannot proceed, you can reject it from the installation list. Rejection requires a written reason.
---
## Installation status workflow from scheduled to approved
**URL:** https://docs.heyzack.ai/docs/installations/statuses
**Description:** Understand every installation status, how they group together in the portal overview, and which statuses allow actions like assigning or rejecting.
Every installation in the Partner Portal has a status that tells you exactly where the job stands. Statuses advance automatically as the handyman completes each stage of the work, and a few statuses are set by actions you take in the portal — such as assigning a handyman or rejecting a job. Understanding the full status list helps you monitor your pipeline accurately and take the right action at the right time.
## All statuses
## How statuses group in the portal
The Installations page groups individual statuses into five broader categories for the overview cards and the status filter dropdown. This makes it easier to understand your pipeline at a glance without counting individual statuses.
| Group | Statuses included |
|---|---|
| **Scheduled** | `SCHEDULED`, `INSTALLER_ASSIGNED` |
| **En Route** | `EN_ROUTE` |
| **In Progress** | `INSTALLATION_IN_PROGRESS`, `INSTALLATION_COMPLETED`, `CONTRACT_SENT`, `CONTRACT_SIGNED` |
| **Approved** | `CUSTOMER_APPROVED` |
| **Rejected** | `CANCELLED`, `REJECTED` |
## Typical workflow progression
A successful installation moves through the following sequence:
## Which statuses allow actions
Not every action is available at every stage. The table below summarizes what you can do based on the current status.
| Status | Assign handyman | Reassign handyman | Reject installation |
|---|---|---|---|
| `SCHEDULED` | Yes | No | Yes |
| `INSTALLER_ASSIGNED` | No | Yes | No |
| `EN_ROUTE` | No | Yes | No |
| `INSTALLATION_IN_PROGRESS` | No | No | No |
| `INSTALLATION_COMPLETED` | No | No | No |
| `CONTRACT_SENT` | No | No | No |
| `CONTRACT_SIGNED` | No | No | No |
| `CUSTOMER_APPROVED` | No | No | No |
| `CANCELLED` | No | No | No |
| `REJECTED` | No | No | No |
## Related pages
---
## Order smart home devices through the Partner Portal
**URL:** https://docs.heyzack.ai/docs/inventory/overview
**Description:** Understand the Orders page: view your order history, monitor statuses, search and filter orders, and access the HeyZack storefront.
The Orders page is your central hub for tracking every device order you have placed through the HeyZack Partner Portal. At a glance you can see how many orders are active, which are awaiting approval, and which have already been delivered — all without leaving the portal.
## Summary cards
At the top of the page, five cards give you an instant snapshot of your order activity:
| Card | What it shows |
|---|---|
| **Total** | The total number of orders you have ever placed |
| **Pending** | Orders submitted but not yet approved |
| **Approved** | Orders that have been confirmed and are being prepared |
| **Delivered** | Orders that have been fulfilled and shipped to you |
| **Cancelled** | Orders that were voided or refunded |
## Order list
Below the summary cards you will find a paginated list of all your orders. Each order row displays:
- **Order ID** — the unique reference number for the order
- **Item name** — the name of the primary product in the order
- **Quantity** — the total number of units across all line items
- **Total amount** — the order value in EUR (e.g. €240.00)
- **Status** — the current state of the order (see below)
- **Ordered date** — the date you placed the order
- **Delivery date** — the date the order was fulfilled (shown only for delivered orders)
## Order statuses
Every order moves through a defined lifecycle. The status badge on each row tells you exactly where an order stands.
## Searching and filtering
Use the search bar and status filter to find specific orders quickly.
- **Search** — type an item name or order ID to narrow the list in real time
- **Status filter** — select Pending, Approved, Delivered, or Cancelled to show only orders in that state; select **All** to clear the filter
## Available products
You can order the following smart home devices through the HeyZack storefront:
- Door Lock
- Security Camera
- Motion Sensor
- Smart Home Hub
- Window Sensor
- Smart Doorbell
## Opening the storefront
Click **Shop Now** in the top-right corner of the Orders page to open the HeyZack Shopify storefront. You are signed in automatically via SSO — you do not need to create a separate Shopify account or enter your credentials again.
---
## Place and track smart home device orders
**URL:** https://docs.heyzack.ai/docs/inventory/placing-orders
**Description:** Learn how to shop on the HeyZack storefront, apply partner credits at checkout, and track your orders through every stage of fulfilment.
Ordering devices through the HeyZack Partner Portal is a two-step process: you shop on the HeyZack Shopify storefront and then monitor each order's progress from the Orders page. This guide walks you through both steps, including how to apply your available partner credit to reduce the amount due at checkout.
## Place an order
## Track an order
All orders you place through the storefront are visible on the **Orders** page. To check the status of a specific order:
## Order status lifecycle
Orders move through the following stages:
```
Pending → Approved → Delivered
↓
Cancelled
```
| Status | Meaning |
|---|---|
| **Pending** | Order submitted; waiting for payment confirmation |
| **Approved** | Payment confirmed; order is being prepared for shipment |
| **Delivered** | Order fulfilled and shipped to you |
| **Cancelled** | Order voided, refunded, or cancelled before fulfilment |
## Using partner credit
Partner credit is a balance the portal applies as a discount against your Shopify order total. You generate a coupon code from the Dashboard and paste it at checkout.
---
## Financial reports: revenue, tier, and sales data
**URL:** https://docs.heyzack.ai/docs/reports/financial-reports
**Description:** Review your revenue by source, profit margins, payment aging, partner commissions, and customer satisfaction scores for any date range.
The Financial Reports tab gives you a consolidated view of your business's financial performance. It covers revenue from three streams — partner revenue, product sales, and service fees — alongside profitability by product category, how quickly your outstanding payments are being collected, and a per-partner commission breakdown. The same Reports page also surfaces handyman performance data and customer satisfaction scores that directly influence your partner standing with HeyZack.
## Financial overview metrics
Four summary cards appear at the top of the Financial tab and update with your selected date range.
| Metric | What it shows |
|---|---|
| **Total Revenue** | Combined revenue across all sources — partner revenue, product sales, and service fees — for the selected period. |
| **Profit Margin** | Your blended profit margin as a percentage across all revenue categories. |
| **Collection Efficiency** | The percentage of invoiced amounts collected within 60 days. An 88% collection rate means 88 cents of every dollar is received within two months. |
| **Outstanding Payments** | The current total of unpaid invoices across all aging buckets. |
## Revenue by source
The **Revenue Trends by Source** line chart breaks your total revenue into three streams plotted month over month:
- **Partner revenue** — revenue attributed directly to your partner account from commissions and referrals
- **Product sales** — revenue from smart home devices sold through your installations
- **Service revenue** — revenue from installation labor and ongoing service fees
Use this chart to understand which revenue stream is growing fastest and where you may have room to increase focus. Service revenue typically carries the highest profit margins, as shown in the margins chart alongside it.
## Profit margins by category
The **Profit Margins by Category** bar chart shows the margin percentage for each product and service category you operate in:
| Category | Approximate margin |
|---|---|
| Smart Locks | 32.5% |
| Cameras | 28.7% |
| Thermostats | 35.2% |
| Sensors | 42.1% |
| Installation (labor) | 65.8% |
| Support services | 78.3% |
Installation labor and support services carry significantly higher margins than hardware sales. If you are looking to improve overall profitability, expanding service volume relative to product volume is the most direct lever.
## Payment collection analysis
The **Payment Collection Analysis** panel breaks down the total value of payments by how long they have been outstanding:
- **0–30 days** — current invoices, typically 65% of your total receivables
- **31–60 days** — slightly overdue but within normal collection cycles
- **61–90 days** — overdue accounts that should be followed up actively
- **90+ days** — aged receivables that may require escalated collection action
The **Outstanding Payments Aging** pie chart shows the proportion of overdue amounts (31 days and older) split across aging buckets. Use this to prioritize your collections outreach — the older the bucket, the lower the likelihood of recovery without active effort.
## Partner commission summary
The **Partner Commission Summary** table lists each partner sub-account or team member alongside their financial contribution for the selected period:
- **Installations completed** — the number of jobs the partner performed
- **Revenue generated** — the total revenue those installations produced
- **Commission rate** — the percentage rate applied to their revenue (typically 8–10% depending on tier)
- **Commission earned** — the calculated commission amount for the period
- **Status** — whether the commission has been paid or is pending
## Handyman performance summary
The **Handyman Performance** tab (accessible from the same Reports page) surfaces team-level data that connects directly to your financial outcomes. Key metrics for each handyman include:
- **Installations completed** — total jobs finished in the selected period
- **Star rating** — the average customer rating out of 5.0, based on post-installation surveys
- **Avg. response time** — how quickly the handyman responds to new job assignments, measured in hours
- **Certifications held** — the number of active HeyZack product certifications
- **Revenue generated** — the total revenue attributed to that handyman's completed jobs
The tab also includes a **skill-level radar chart** showing the team's average proficiency across six areas: smart locks, cameras, thermostats, sensors, network setup, and customer service. Use this to identify skill gaps and prioritize training investments.
## Customer satisfaction scores
The **Customer Satisfaction** tab tracks four metrics that reflect how customers experience your service:
| Metric | Description |
|---|---|
| **Overall NPS Score** | Net Promoter Score calculated from post-installation surveys. A score above 50 is considered excellent. |
| **Avg. Rating** | Mean star rating across all customer reviews for the selected period, on a 1–5 scale. |
| **Response Rate** | The percentage of customers who completed the satisfaction survey after their installation. |
| **Issue Resolution Rate** | The percentage of reported issues that were resolved, across all support categories. |
### How satisfaction scores affect your partner standing
HeyZack uses your NPS and average rating as inputs when reviewing partner tier eligibility and account standing. Sustained low satisfaction scores — particularly an NPS below 30 or an average rating below 4.0 — may result in a tier review or additional support requirements from your account manager.
The **Issue Resolution Performance** panel breaks down resolution rates by category:
- **Technical support** — issues with device setup or connectivity
- **Installation issues** — problems arising during or after the installation job
- **Product questions** — customer inquiries about device functionality
- **Billing inquiries** — questions or disputes related to invoicing
- **Warranty claims** — requests made under the product warranty
Each category shows the number resolved, the total raised, and the average resolution time in hours. Categories marked with a resolution rate below 80% are highlighted as needing attention.
## Exporting financial data
You can export financial report data for offline analysis or to share with your accounting team.
## Related pages
---
## Installation performance reports and analytics
**URL:** https://docs.heyzack.ai/docs/reports/installation-reports
**Description:** Track total installations, completion rates, average job time, and daily trends to understand your installation pipeline's operational health.
The Installation Reports tab gives you a detailed picture of how your installation operations are performing over any date range. It pulls live data from every installation record in your account and surfaces four key metrics at the top, followed by trend charts and a device type breakdown. Use this tab to understand whether your team is keeping up with demand, how long jobs are taking, and which product categories are seeing the most activity.
## Key metrics
The top of the Installations tab shows four summary cards that update based on your selected date range.
| Metric | What it measures |
|---|---|
| **Total Installations** | The total count of all installation records in your account for the selected period, regardless of status. |
| **Completion Rate** | The percentage of completed installations out of your total. Calculated as completed ÷ total × 100. |
| **Avg. Installation Time** | The average number of hours a job takes from start to finish. The system currently tracks a baseline of 2.2 hours across installation types. |
| **Pending Backlog** | The count of installations that are not yet completed or cancelled — this includes everything still in progress or scheduled. |
## Status breakdown
Your installations fall into three primary status groups:
- **Completed** — Finished jobs that customers have approved. These count toward your completion rate.
- **Scheduled** — Jobs that have a confirmed date and assigned handyman but have not yet started.
- **Pending / In progress** — Everything else that is not completed or cancelled, including jobs actively underway or awaiting assignment.
## Filtering by date range
The date range selector at the top of the Reports page controls which installations appear in this tab. Switch between **Today**, **Last 7 days**, **Last 30 days**, **Last 90 days**, or a **Custom range** to focus on the period that matters for your analysis.
## Daily installation trends chart
The line chart below the summary cards plots your completed and scheduled installations day by day across the selected date range. Two lines run in parallel:
- **Completed** (green) — installations finished each day
- **Scheduled** (blue) — installations that were scheduled for each day
Use this chart to spot patterns: days with high scheduled counts but low completed counts may indicate rescheduling or handyman availability issues. A rising completed line with a flat scheduled line suggests your team is working through the existing backlog.
## Device type distribution
The pie chart alongside the trend chart shows how installations are distributed by product type — for example, smart locks, cameras, thermostats, and sensor packages. Each slice represents one product category, sized by the total quantity installed across all jobs in the selected period.
Use this chart to understand which product types drive the most installation volume. If a single category dominates, ensure your handymen hold the relevant certifications and that you have adequate inventory on hand.
## Understanding your completion rate
A healthy completion rate depends on the mix of completed, in-progress, and scheduled jobs in your pipeline.
## Next steps
---
## Analytics and reporting for your partner business
**URL:** https://docs.heyzack.ai/docs/reports/overview
**Description:** The Reports section covers installation activity, revenue, handyman performance, and customer satisfaction. Filter by date range and export data for any period.
The Reports section is where you analyze the health and performance of your partner business. Every metric draws from live data in your account — installations you have scheduled and completed, revenue your handymen have generated, and feedback your customers have submitted. Use these reports to spot trends, identify gaps, and make decisions backed by data rather than guesswork.
## Navigating to Reports
Select **Reports** from the left sidebar to open the section. The page loads with the **Installations** tab active and the **Last 30 days** date range selected by default.
## Choosing a date range
The date range selector sits at the top of the Reports page and applies to all five report tabs. You can switch ranges at any time and each tab updates instantly.
## Report categories
The Reports page is organized into five tabs. Each tab focuses on a different dimension of your business.
## Refreshing report data
Select the **Refresh** button in the top-right corner of the Reports page to reload the current tab with the latest data from your account. This is useful if you have recently completed installations or if you want to confirm that newly submitted customer feedback has been captured.
## Exporting reports
Select the **Export** button to download report data. Exports are available in PDF, Excel, and CSV formats depending on the report type.
## Explore individual report pages
---
## Change your Partner Portal account password
**URL:** https://docs.heyzack.ai/docs/settings/password
**Description:** Change your Partner Portal login password from the Settings page. Covers the password change form, requirements, forgot password, and first-login reset.
You can change your Partner Portal password at any time from the Settings page. The portal uses your current password to verify your identity before accepting a new one, so you always need access to your existing credentials to complete the process.
## Changing your password
## Password requirements
Your new password must meet all of the following:
- At least 8 characters long
- Different from your current password
The portal checks these requirements before sending any request. If a field fails validation, you will see a specific error message explaining what needs to be corrected.
## Forgot your password
If you cannot sign in because you have forgotten your password, use the **Forgot password** link on the sign-in page. The portal will send a reset link to your registered email address. Follow the instructions in that email to set a new password, then sign in as normal.
## First-login password reset
When HeyZack activates a new partner account, you receive an invitation with temporary credentials. The portal prompts you to set a new password the first time you sign in. Complete that prompt before accessing any other part of the portal — you cannot skip it.
## Security recommendations
Avoid using easily guessable information such as company names, dates, or common words. If you suspect your account has been accessed by someone else, change your password immediately and contact HeyZack support.
---
## Update your partner profile and company details
**URL:** https://docs.heyzack.ai/docs/settings/profile
**Description:** Edit your company name, address, and phone number from the Settings page. Your email address is read-only and must be updated by contacting HeyZack support.
The Settings page lets you keep your partner account information up to date. You can edit your company name, address, and phone number at any time. Changes take effect as soon as you save them, and they are reflected across the portal immediately.
## Finding Settings
Select **Settings** in the left sidebar navigation to open the Settings page. The **General** section is visible by default when you arrive — you do not need to navigate to a separate tab.
## Editable profile fields
The **Company Profile** card contains the fields you can update:
| Field | Description |
|---|---|
| **Company Name** | The name of your partner business as registered with HeyZack |
| **Address** | Your company's physical or mailing address |
| **Phone** | A contact phone number for your business |
All three fields accept free-form text. The **Address** field is a multi-line text area, so you can enter a full postal address across multiple lines.
## Saving your changes
If you click **Save Changes** without having modified any of the editable fields, the portal shows a "No changes to save" notification and no update is sent. Only changes to Company Name, Address, or Phone trigger an actual save — the Email field is excluded from this check.
---
## HeyZack CRM documentation
## Authenticate with the Heyzack CRM
**URL:** https://docs.heyzack.ai/docs/crm/authentication
**Description:** Learn how to sign in to the CRM, obtain a bearer token for API access, and handle token expiry and common authentication errors.
The Heyzack CRM uses email and password authentication for browser-based access. For API access, every request must include a bearer token in the `Authorization` header. This page explains how to sign in, where to find your token, and how to handle common authentication errors.
## Signing in to the CRM
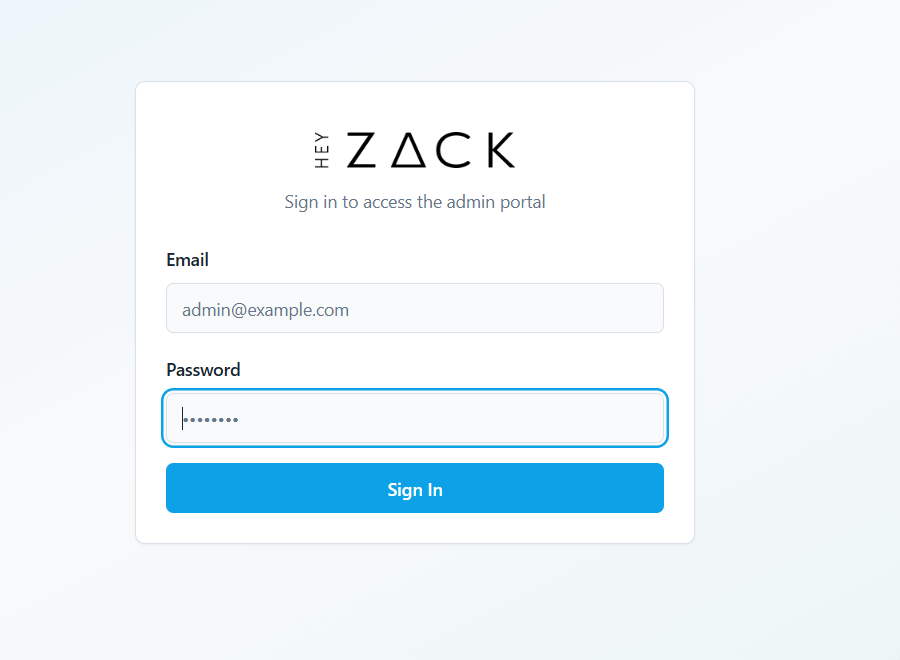
Navigate to the CRM login page. Enter your email address and password, then click **Sign in**.
If you've forgotten your password, click **Forgot password** on the sign-in page. Enter your email address to receive a password reset link.
## Using the API
All API requests must include a valid bearer token in the `Authorization` header:
```http
Authorization: Bearer
```
Your token is issued when you sign in to the portal. To use it in API clients or scripts, copy it from your browser session after signing in.
## Token expiry and refresh
Tokens have a limited lifespan. If your token expires, any API request you make will return a `401 Unauthorized` response.
To get a fresh token, sign in to the portal again. The new token is available immediately for subsequent API requests.
There is no automatic token refresh — you must sign in again to obtain a new token when the old one expires.
## Common auth errors
| Status | Meaning |
|--------|---------|
| 401 | Invalid or expired token. Sign in again to get a fresh token. |
| 403 | Valid token but insufficient permissions. Your role does not allow access to this resource. Contact your admin to update your permissions. |
---
## Heyzack CRM: frequently asked questions
**URL:** https://docs.heyzack.ai/docs/crm/faq
**Description:** Answers to common questions about accounts, roles, chat, leads, referral tokens, and portal features in the Heyzack CRM.
This page answers the most common questions from portal users. If you have a question that isn't covered here, reach out to your Heyzack account manager or ask your admin.
---
## Heyzack Partner Portal: Smart Home Installation CRM
**URL:** https://docs.heyzack.ai/docs/crm
**Description:** The Heyzack CRM helps you manage smart home installations, partners, handymen, leads, payments, and your team from one dashboard.
The Heyzack CRM is your central hub for managing every aspect of your smart home installation business. From tracking leads and scheduling installations to paying partners and chatting with your team in real time, everything you need is in one place.
## Get started in four steps
## What you can do
---
## Heyzack CRM: smart home operations hub
**URL:** https://docs.heyzack.ai/docs/crm/introduction
**Description:** A web-based CRM and operations dashboard for managing smart home installations, leads, partners, payments, and your entire field team.
The Heyzack CRM is a web-based CRM and operations dashboard built for businesses that install smart home systems. It gives admins, managers, support staff, partners, and handymen a single place to manage everything — from capturing a lead to closing out a completed installation and processing a partner payout.
## Who uses the CRM
The CRM is designed for everyone on your team and in your partner network:
- **Admins** — full access to all settings, users, and data
- **Managers** — oversee installations, leads, and partner performance
- **Support staff** — handle day-to-day operations and customer communication
- **Partners** — refer leads and track their referral activity
- **Handymen** — receive and complete installation assignments
Each role sees only the sections and actions appropriate to their responsibilities. You control this through granular menu-level permissions in **Settings**.
## What you can do
The CRM covers every part of your operations in one place:
- **Installations** — create, assign, and track smart home installations through their full lifecycle, from draft to customer approval
- **Leads** — capture and qualify inbound leads, track their source, and convert them to orders
- **Orders and sales reporting** — review order history, analyze revenue trends, and filter results by date range or partner
- **Chat** — communicate with partners and handymen in real time; every conversation is archived and searchable
- **Payments** — calculate and process commission payouts to your partner network with a full audit trail
- **User management** — create accounts, assign roles, and configure which sections each person can access
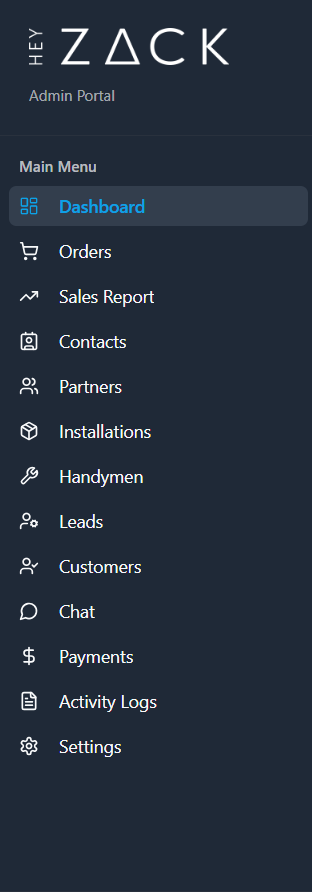
The **Admin Portal** sidebar groups these capabilities in one place: Dashboard, Orders, Sales Report, Contacts, Partners, Installations, Handymen, Leads, Customers, Chat, Payments, Activity Logs, and Settings.
## Multilingual support
The CRM is available in English and French. You can switch languages at any time using the dropdown in the sidebar. Your language preference is saved across sessions.
## Where to go next
---
## Get started with the Heyzack CRM
**URL:** https://docs.heyzack.ai/docs/crm/quickstart
**Description:** Sign in, explore the dashboard, create your first installation, add a lead, and set up your team — everything you need to hit the ground running.
This guide walks you through the essential steps to get your team up and running on the Heyzack CRM. By the end, you'll have signed in, created your first installation, added a lead, and set up at least one team member — giving you a working foundation for your day-to-day operations.
Once created, you can qualify the lead, link it to a partner, and eventually convert it to an order.
---
## Troubleshooting common issues in the portal
**URL:** https://docs.heyzack.ai/docs/crm/troubleshooting
**Description:** Step-by-step solutions for login problems, real-time chat issues, missing installations, lead status errors, and other common Heyzack portal issues.
This page covers the most frequently reported issues in the Heyzack Partner Portal and how to resolve them. Work through the steps for your issue before contacting support — most problems can be resolved without raising a ticket.
## Authentication problems
## Chat problems
## Installations
## Leads
## General
If the portal is consistently slow across browsers and connections, the issue may be on the server side. Report it to your admin so they can check the platform status.
---
## Authenticate API requests with Bearer tokens
**URL:** https://docs.heyzack.ai/docs/crm/api/authentication
**Description:** Learn how to obtain your Bearer token after signing in to the Heyzack Partner Portal and how to pass it correctly in every API request.
Every Heyzack Partner Portal API endpoint requires authentication. The API uses Bearer tokens: you obtain a token by signing in to the portal, then include it in every request you make.
## Getting your token
Sign in to the Heyzack Partner Portal. On successful login, the portal issues a Bearer token tied to your account and role (partner, handyman, or admin). Your role determines which data you can access and which actions you can perform.
## Passing the token
Include your token in the `Authorization` header of every API request:
```
Authorization: Bearer
```
### Example request with curl
```bash
curl -X GET "https:///api/v1/chat/connections" \
-H "Authorization: Bearer " \
-H "Content-Type: application/json"
```
## Token expiry
Tokens expire after a period of inactivity. If you receive a `401 Unauthorized` response, your token has expired. Sign in to the portal again to get a fresh token, then retry your request.
## Error responses
| Scenario | Response |
|----------|----------|
| No token or malformed token | `401 Unauthorized` |
| Valid token, insufficient permissions | `403 Forbidden` |
```json
{ "error": "Unauthorized" }
```
---
## Heyzack CRM REST API overview
**URL:** https://docs.heyzack.ai/docs/crm/api/overview
**Description:** Learn the base URL, versioning scheme, request and response format, authentication header, and HTTP status codes for the Heyzack CRM API.
The Heyzack CRM REST API lets you integrate portal functionality—messaging, connections, and more—directly into your own applications. Every endpoint uses JSON over HTTPS, requires a Bearer token for authentication, and wraps successful responses in a consistent `data` envelope.
## Base URL
All API requests are made to:
```
https:///api/v1
```
Replace `` with the domain of your Heyzack CRM instance.
## Versioning
The current API version is **v1**. The version is embedded in every URL path (`/api/v1/...`). When a new major version is released, the older version remains available at its existing path until a deprecation period ends.
## Request format
For `POST` endpoints, send a JSON body and include the `Content-Type` header:
```
Content-Type: application/json
```
`GET` endpoints accept parameters as URL query strings instead.
## Authentication
Every request requires a Bearer token in the `Authorization` header:
```
Authorization: Bearer
```
See [Authentication](/api/authentication) for details on obtaining and using tokens.
## Response format
Successful responses return HTTP `200` and wrap the result in a `data` key:
```json
{
"data": { ... }
}
```
## Error responses
When a request fails, the API returns a JSON object with an `error` key describing what went wrong:
```json
{
"error": "Error message here"
}
```
## HTTP status codes
| Code | Meaning |
|------|---------|
| 200 | Success |
| 400 | Bad request — missing or invalid parameters |
| 401 | Unauthorized — missing or invalid token |
| 403 | Forbidden — valid token but insufficient permissions |
| 404 | Resource not found |
| 500 | Internal server error |
---
## Understanding the installation lifecycle
**URL:** https://docs.heyzack.ai/docs/crm/concepts/installation-lifecycle
**Description:** Learn the stages a smart home installation moves through in the CRM, from initial draft to customer approval or cancellation.
An installation represents a single smart home setup job — from the moment it is created to the day the customer signs off. The CRM tracks each installation through a defined set of statuses so that admins, managers, and partners always know where a job stands. Understanding the lifecycle helps your team coordinate handymen, communicate with customers, and close jobs without things falling through the cracks.
## Lifecycle stages
## Status transitions
You move an installation between statuses from the installation detail page. Open any installation by clicking its row in the Installations list, then use the status controls on the detail page to advance or update the job's state.
## Key fields
Every installation record contains the following core fields:
| Field | Description |
|-------|-------------|
| Title | A name or short description identifying the job |
| Customer | The end customer receiving the smart home installation |
| Partner | The partner who referred or sold the job |
| Handyman | The technician assigned to carry out the work |
| Scheduled Date | The date the installation is planned to take place |
| Status | The current lifecycle stage of the installation |
---
## Partners and handymen: roles in the network
**URL:** https://docs.heyzack.ai/docs/crm/concepts/partners-handymen
**Description:** Understand the difference between partners and handymen in the CRM, how they relate to installations, and how they communicate.
The Partner Portal is built around two key field roles: partners and handymen. Partners bring in customers and business; handymen do the on-site work. Both are managed directly in the portal and are connected to each other through the installations they share. Understanding how these roles fit together helps you coordinate jobs and keep everyone aligned.
## Partners
Partners are the businesses or individuals who sell smart home products and refer customers to your network. Each partner has a unique **Partner Code** that identifies them across the portal and can be used for attribution and commission tracking.
Partners can be assigned to installations, and they earn commissions on completed jobs. You can view a partner's full history — including associated installations, leads, and activity — from their detail page in the Partners section.
## Handymen
Handymen are the technicians who carry out the physical installation work on-site. They are assigned to installations by admins or managers once a job is scheduled. Each handyman has an **availability status** and a **performance rating** visible in the portal.
Like partners, handymen have a detail page where you can see all installations they have been assigned to, along with their activity history.
## How they connect
Partners and handymen are linked through installations. A partner brings the customer and the business opportunity; a handyman is then assigned to fulfill the job. The installation record ties both parties together, giving every stakeholder a shared view of the job's status and progress.
## Communication
Partners and handymen can chat with each other and with admins through the **Chat** feature in the portal. Chat access is scoped to shared jobs — participants must be connected through a common installation before they can message each other. This keeps conversations focused and prevents unrelated parties from contacting one another.
## Viewing details
To view a partner's or handyman's full profile, click any row in the Partners or Handymen list. The detail page shows all associated installations, leads, and recent activity for that record.
---
## Roles and permissions in the CRM
**URL:** https://docs.heyzack.ai/docs/crm/concepts/roles-permissions
**Description:** Learn how Admin, Manager, and Support roles work in the Heyzack CRM, and how to control which menu sections each user can access.
The CRM uses a role-based access system to control what each user can see and do. There are three roles — Admin, Manager, and Support — and for Manager and Support users you can fine-tune access by enabling or disabling individual menu items. This lets you give team members exactly the access they need without exposing unrelated parts of the CRM.
## Roles
| Role | Description |
|------|-------------|
| Admin | Full access to all features; ignores permission restrictions |
| Manager | Configurable access; permissions assigned at account creation |
| Support | Configurable access; permissions assigned at account creation |
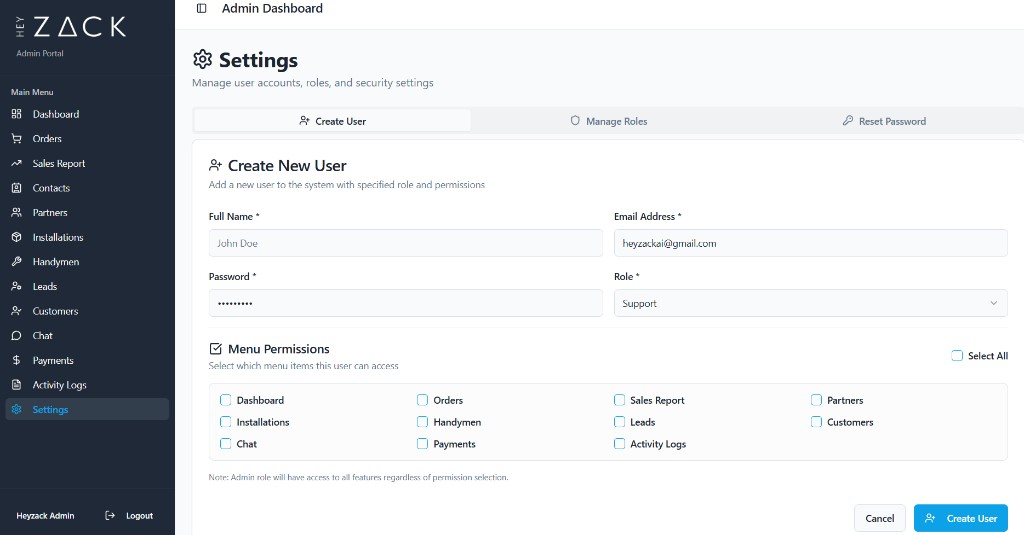
## Menu permissions
Each Manager and Support user has a set of menu permissions that controls which sections of the CRM appear in their sidebar. You can enable or disable any of the following menu items per user:
| Menu item | Description |
|-----------|-------------|
| Dashboard | Overview and summary metrics |
| Orders | View and manage customer orders |
| Sales Report | Revenue and sales analytics |
| Contacts | Contact records |
| Partners | Partner management |
| Installations | Smart home installation tracking |
| Handymen | Technician management |
| Leads | Lead tracking and pipeline |
| Customers | Customer records |
| Chat | Messaging between CRM users and field contacts |
| Payments | Payment records and transaction history |
| Activity Logs | Audit trail of CRM activity |
| Settings | User management and account settings |
If a user has no permissions assigned (empty permissions list), the CRM treats them as having full access and shows all menu items.
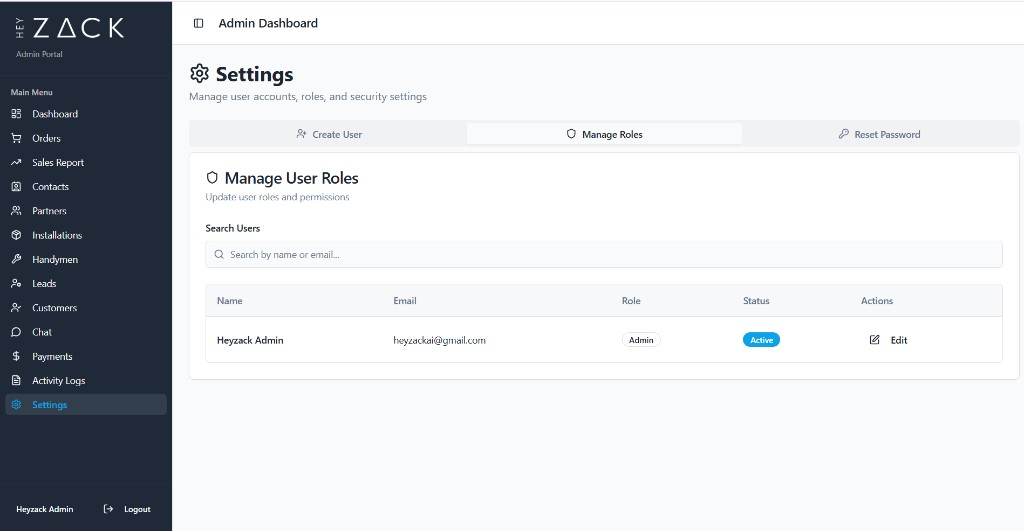
## Changing roles
To update a user's role after they have been created:
## Creating users
To add a new user to the CRM:
---
## Activity logs: audit every action in the portal
**URL:** https://docs.heyzack.ai/docs/crm/features/activity-logs
**Description:** Review a timestamped record of every user action in the portal — from logins and status changes to payout creation and team management events.
Activity Logs give you a complete, timestamped record of every action taken inside the Heyzack CRM. Every significant event — from a user logging in to a payout being created — is captured automatically, so you always have an accurate picture of what happened, when, and who was responsible.
## What is logged
The portal records user-driven actions across all major areas of the system, including:
- **Logins** — when a user signs in to the portal
- **Installations** — when an installation is created or updated
- **Leads** — when a lead's status or details change
- **Orders** — when an order is placed
- **Payouts** — when a payout record is created
- **User management** — when users are added, updated, or removed
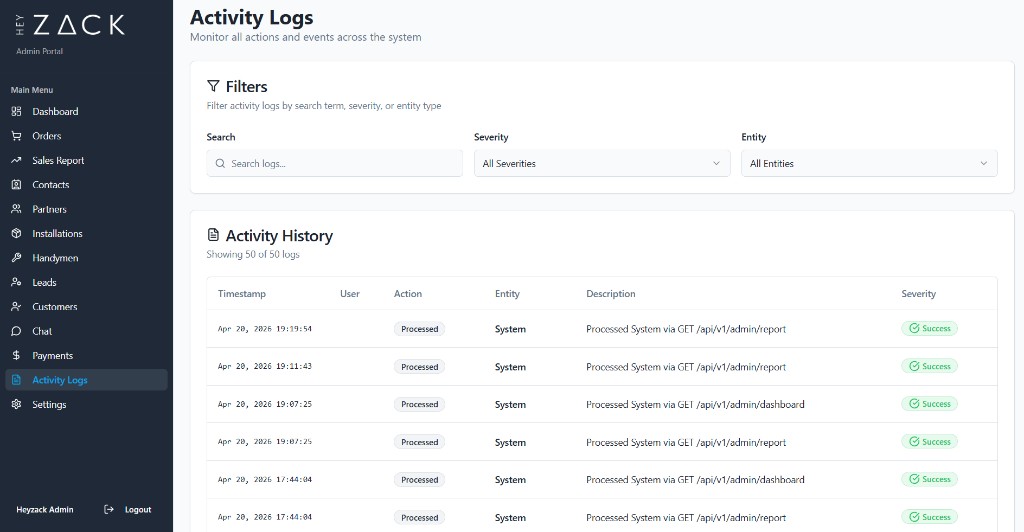
## Browsing logs
Use the filter bar to narrow down the log list:
- **Search** — type any text to match against the log description, user name, or entity type.
- **Severity** — filter by Info, Success, Warning, or Error to focus on a specific class of event.
- **Entity** — filter by entity type (for example, Installation, Payout, or User) to see only logs related to that part of the system.
## Log entry fields
Each row in the activity log table contains the following fields:
| Field | Description |
|-------|-------------|
| Timestamp | The exact date and time the action occurred (displayed as `MMM DD, YYYY HH:mm:ss`) |
| User | The name and email address of the portal user who performed the action |
| Action | What was done — for example, `Created`, `Updated`, `Deleted`, `Approved`, `Rejected`, or `Completed` |
| Entity | The type of record that was affected, such as Installation, Lead, or Payout |
| Description | A human-readable summary of the specific change that was made |
| Severity | The outcome level of the action: Info, Success, Warning, or Error |
## Use cases
---
## Real-time chat with partners and handymen
**URL:** https://docs.heyzack.ai/docs/crm/features/chat
**Description:** Send and receive real-time messages with partners, handymen, and admins in the Heyzack CRM — with support for text and image attachments.
The Chat section lets CRM users communicate in real time without leaving the dashboard. Partners can reach out to their connected handymen or contact the Heyzack admin team directly. Handymen can do the same. Admins can message any partner or handyman at any time. Messages appear instantly and are preserved in a scrollable conversation history.
## Who can chat with whom
Three conversation types are supported:
## Starting a conversation
## Welcome message
When a partner or handyman opens a chat with the admin team for the first time, they will see an automatic welcome message as the first item in the conversation:
> "Welcome to Heyzack! How can we help you today?"
This message comes from the admin account and only appears in partner-to-admin and handyman-to-admin conversations. It does not appear in partner-to-handyman chats or in conversations that admins initiate.
## Sending messages
Type your message in the input field at the bottom of the conversation and press **Enter** or click the **Send** button. The chat supports plain text only. You can also press **Enter** to send without reaching for the mouse.
## Sending images
Click the **paperclip** icon to attach an image. The CRM accepts the following formats:
- JPEG
- PNG
- WebP
- GIF
A preview of the selected image appears above the input field before you send. Click **Cancel** to remove it if you chose the wrong file.
## Chat history
Each conversation loads up to 50 messages per page, displayed in chronological order (oldest first). Scroll up to load earlier messages. The CRM scrolls to the most recent message automatically when the conversation opens or when a new message arrives.
## Real-time delivery
Messages are delivered instantly. There is no need to refresh the page — incoming messages appear as soon as they are sent by the other party.
For the API reference, see [Send a message](/api/chat/send-message).
---
## Dashboard: your smart home operations overview
**URL:** https://docs.heyzack.ai/docs/crm/features/dashboard
**Description:** Get a real-time snapshot of sales, leads, installations, partners, and recent orders the moment you open the Heyzack CRM.
The dashboard is the first screen you see after logging in. It brings together the most important numbers across your entire operation — sales volume, pipeline activity, active installations, and pending financial actions — so you can orient yourself quickly and decide where to focus your attention.
## Key metrics
Four stat cards run across the top of the dashboard. Each one pulls live data and compares it against the previous period.
## Activity cards
Below the stat cards, three summary cards give you an operational pulse check.
## Recent Installations
The **Recent Installations** card shows the four most recently updated installations. Each row displays the installation title, the customer's name, and a colour-coded status badge so you can spot anything that needs attention without navigating away from the dashboard.
Click any installation row to open the full [installation detail view](/features/installations).
## Top Partners
The **Top Partners** card ranks your partners by total sales value. Up to four partners appear, listed from highest to lowest revenue, with each partner's name, partner code, and total sales amount in €. Use this to identify your highest-performing relationships and replicate what's working.
## Recent Orders
The **Recent Orders** table pulls the last five orders from the sales report. Each row includes:
| Column | Description |
|---|---|
| Order # | The unique order number, prefixed with `#` |
| Email | The customer email address linked to the order |
| Address | The shipping or service address |
| Amount | The order total |
| Status | `Fulfilled`, `Unfulfilled`, or another status badge |
| Actions | An **Update** button to change the order status |
You can create a new order directly from the dashboard by clicking the **Create Order** button in the top-right of the orders section.
---
## Manage smart home installations end-to-end
**URL:** https://docs.heyzack.ai/docs/crm/features/installations
**Description:** Search, filter, create, and track every smart home installation from initial scheduling through to customer approval using the Heyzack CRM.
The Installations page is the central hub for tracking every smart home installation your team manages. From here you can monitor progress across all open jobs, find a specific installation by customer or phone number, drill into full details, assign a handyman, move an installation through its lifecycle, and add internal notes — all without leaving the CRM.
## Browsing installations
A search bar and status filter sit at the top of the page.
- **Search** — type any part of the installation title, the customer's name, or a phone number. Results update as you type.
- **Status filter** — narrow the list to installations in a particular stage:
| Filter value | What it shows |
|---|---|
| All Status | Every installation regardless of stage |
| Draft | Created but not yet scheduled |
| Scheduled | Date and time confirmed, awaiting assignment |
| Assigned | A handyman has been assigned |
| In Progress | Work has started on-site |
| Completed | Work finished, pending customer sign-off |
| Customer Approved | Customer has confirmed the installation |
| Cancelled | Installation was cancelled |
## Installation table columns
The main table shows one row per installation with the following columns:
| Column | Description |
|---|---|
| ID | Unique installation identifier (monospace, for reference) |
| Title | Descriptive name of the installation job |
| Customer | Name of the end customer |
| Partner | The partner company responsible for the job |
| Handyman | The technician assigned to carry out the work |
| Scheduled | The confirmed date for the on-site visit |
| Status | Colour-coded badge reflecting the current lifecycle stage |
## Viewing an installation
Click any row in the table to open the installation detail view. The detail view is split into two panels:
- **Left sidebar** — quick info (scheduled date, created date, status), customer information (name, email, phone, address), partner information (name, code, tier, contact details), handyman information, completion photos, contract information, and customer rating.
- **Main panel** — four tabs for deeper information:
## Creating an installation
New installations are created from within the CRM using the standard creation flow. When you create an installation you provide:
- A descriptive title for the job
- The customer to link it to
- The partner responsible
- A scheduled date and time
The installation starts in **Draft** status and moves through the lifecycle as work progresses.
## Updating status
You advance an installation through its lifecycle from the detail view. Use the status controls in the left sidebar or the overview panel to select the next appropriate stage. Each status change is recorded automatically in the Activity timeline so there is a full audit trail.
See [Installation lifecycle](/concepts/installation-lifecycle) for the complete description of every stage and the allowed transitions between them.
## Assigning a handyman
Handyman assignment happens inside the installation detail view. Open the installation you want to assign, then use the Handyman Information section in the left sidebar. Once a handyman is linked, their name, email, and phone number appear in the sidebar and in the main installations table.
---
## Track, qualify, and convert leads to customers
**URL:** https://docs.heyzack.ai/docs/crm/features/leads
**Description:** Capture and manage potential customers in the Heyzack CRM — qualify leads, generate partner referral tokens, and convert them to orders.
The Leads page lets you manage every potential customer from the moment they first express interest through to conversion. You can capture new leads manually, track how a partner brought them in, filter the pipeline by status or priority, and generate a personalised portal token so a lead can self-serve their quote — all from one table view.
## What is a lead?
A lead is a record representing a potential smart home customer. Leads enter the system in two ways:
- **Partner referral** — a partner shares a unique referral link (generated via the Generate Token feature) and the prospect submits their details through it.
- **Manual creation** — a member of your team creates the lead directly in the portal using the Create Lead button.
Each lead captures the customer's name, email, location, the partner or team member they are assigned to, the lead's source, and its current status and priority.
## Lead statuses
## Browsing leads
The search and filter bar at the top of the Leads page gives you three controls:
- **Search** — match leads by name, email address, or location. Results update instantly as you type.
- **Filter by Status** — show only leads in a specific stage. The dropdown is built dynamically from the statuses present in your data, so only statuses that actually exist in your pipeline appear.
- **Filter by Priority** — narrow leads to **High**, **Medium**, or **Low** priority. Priority badges use colour coding: red for High, amber for Medium, and green for Low.
Both the status and priority filters work together with the search field, so you can combine all three to find exactly the leads you need.
## Creating a lead
## Generating a token
The Generate Token feature creates a personalised, time-limited link you can share with a lead so they can access a self-service quote or onboarding flow — without needing a full portal account.
## Lead details
Clicking any lead row (or using the eye icon in the Actions column) navigates to the full lead detail view. Here you can see all the information captured for the lead, the assigned partner, source, timeline, and conversion history.
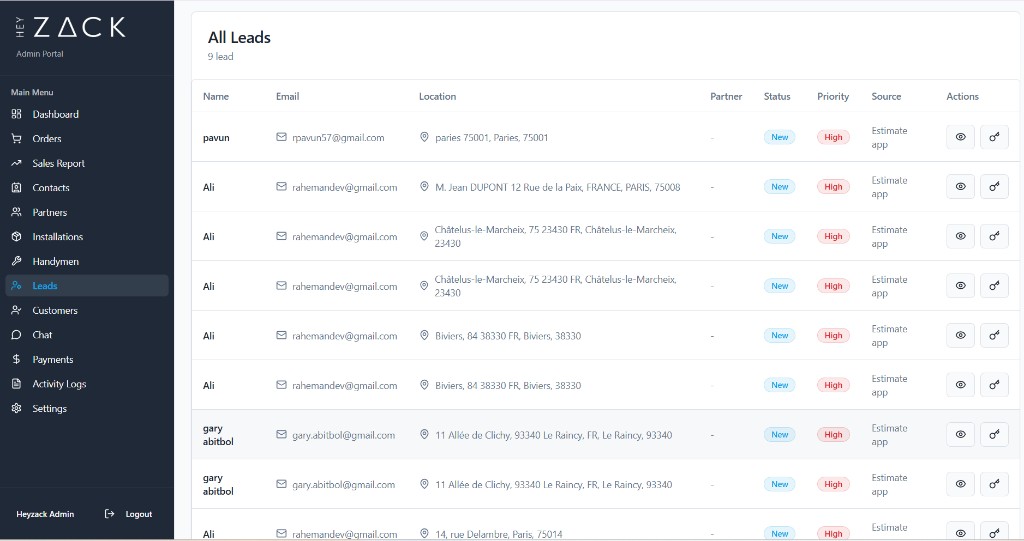
## Converting a lead
Once a lead reaches **Qualified** status, it is ready to be moved through to conversion. Converting a lead creates or links a customer record and an order in the system, marking the lead's status as **Converted**. After conversion, the Generate Token button is no longer shown for that lead because the customer has already been onboarded.
---
## Orders and sales reporting in the portal
**URL:** https://docs.heyzack.ai/docs/crm/features/orders
**Description:** View, create, and update customer orders and analyse revenue trends with date-range filters, partner breakdowns, and CSV export in the CRM.
The Orders and Sales sections of the Heyzack CRM give you full visibility into your revenue pipeline. The Orders page lets you search and manage individual customer orders and update their fulfilment status. The Sales Report page gives you an analytics view with summary metrics, revenue and order-volume charts, and the ability to export the full dataset.
## Orders
The Orders page shows every order returned by the sales report, filtered to the selected date range. Each order row in the table contains:
| Column | Description |
|---|---|
| Order # | Unique order number, prefixed with `#` |
| Email | Customer email address linked to the order |
| Lead Actions | Shows whether a lead exists for that email address; lets you view the lead, generate a portal token, or create a new lead directly |
| Address | Shipping or service address |
| Amount | Order total |
| Status | `Fulfilled`, `Unfulfilled`, or other status badge |
| Actions | **Update** button to change the order status |
The Lead Actions column automatically checks whether a lead record exists in the portal for each order's email address. If a lead is found you see a **Lead Found** badge and can click the lead ID to view it or generate a token. If no lead exists, a **Create Lead** button lets you open the create lead dialog pre-filled with the order's details.
## Creating an order
You can create an order from two places:
- **Dashboard** — click the **Create Order** button in the top-right of the Recent Orders section.
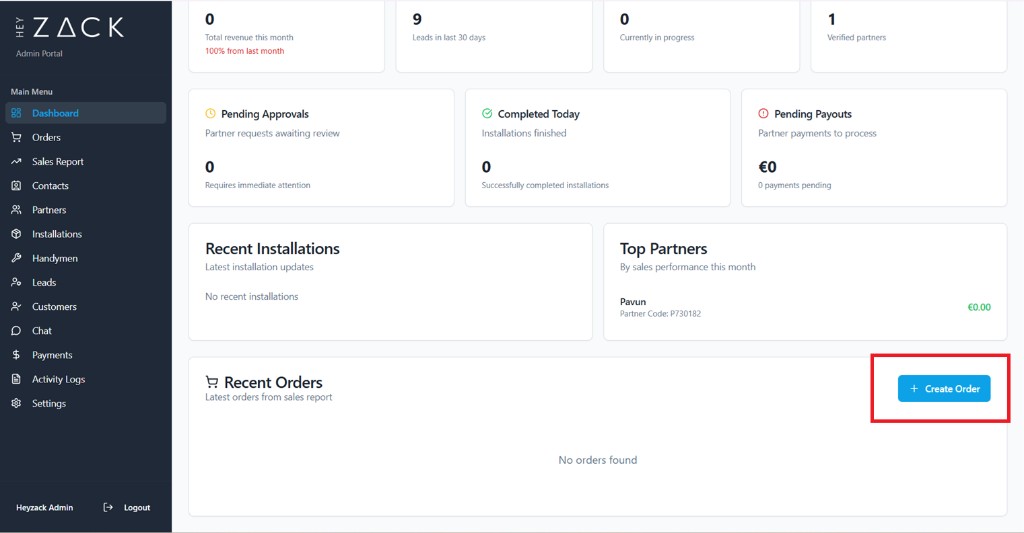
- **Orders page** — click the **Create Order** button in the top-right of the page header.
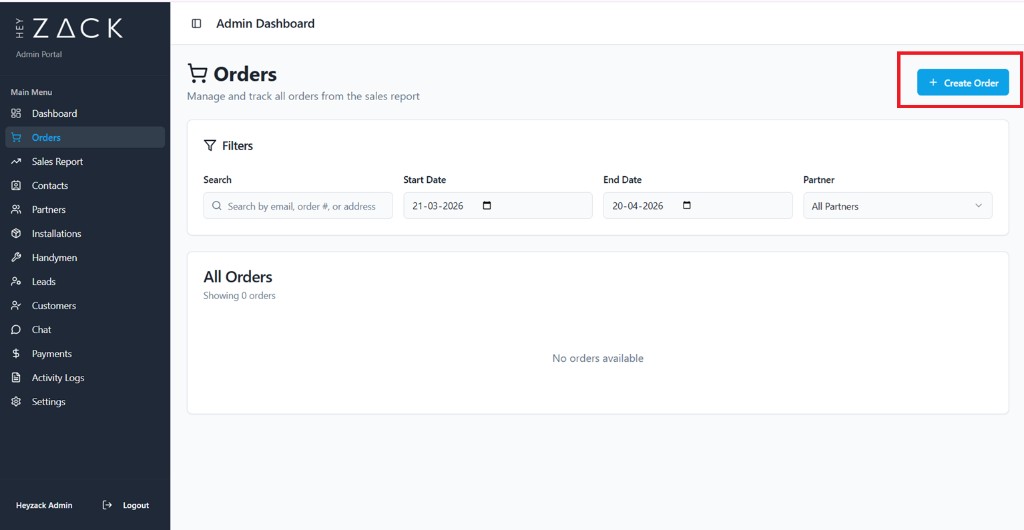
Both buttons open the same **Create Order** dialog where you enter the customer and order details.
## Updating order status
## Sales Report
The Sales Report is accessed from the Sales section in the navigation. It displays four summary metrics at the top of the page:
The report also includes two inline charts:
- **Revenue Trend** — a bar chart showing daily revenue over the last 7 days of the selected range, so you can spot the busiest days at a glance.
- **Orders by Status** — a breakdown of fulfilled, unfulfilled, and pending orders as percentages of the total, with a colour-coded progress bar for each.
- **Order Volume & Revenue** — a 7-day column chart showing the number of orders per day and the corresponding revenue total below each bar.
## Filtering and exporting
The filter panel on both the Orders page and the Sales Report page gives you four controls:
On the Sales Report page, an additional **Period** selector lets you group time-series data by **Daily**, **Weekly**, or **Monthly** intervals.
To download the full dataset, click the **Export CSV** button in the top-right of the Sales Report page. The export respects whichever filters you have applied, so set your date range and partner filter before exporting.
---
## Process and track partner commission payouts
**URL:** https://docs.heyzack.ai/docs/crm/features/payments
**Description:** Create, filter, and track partner commission payouts by status, partner, and date range from the Heyzack crm Payments section.
The Payments section gives you full control over partner commission payouts. You can see outstanding and completed payments at a glance, create new payout records tied to approved installations, and drill into individual transactions to review the full breakdown. All amounts are displayed in euros (€).
## Payout statistics
Four stat cards at the top of the page summarize your payout activity for the selected date range:
## Browsing payouts
Use the filter bar to narrow down which payouts appear in the table.
- **Search** — type a partner name or transaction ID to filter results instantly.
- **Status** — choose All, Pending, Paid, or Cancelled.
- **Partner** — select a specific partner from the dropdown to see only their payouts.
- **Date range** — set a start and end date; the stat cards and charts update to match the selected period.
## Creating a payout
Click **Create Payout** in the top-right corner to open the payout form. Only installations with a `customer_approved` status are eligible.
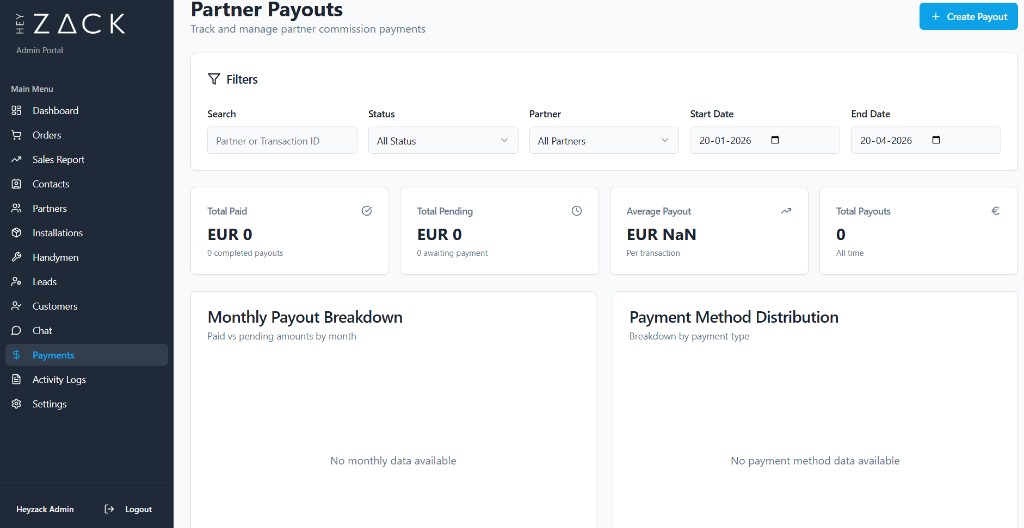
## Payout statuses
| Status | Meaning |
|--------|---------|
| Pending | Payout created but not yet sent to the partner |
| Paid | Commission has been disbursed |
| Cancelled | Payout was voided and will not be processed |
## Viewing payout details
Click the **Eye** icon on any row in the payouts table to open the payout details panel. The panel shows the full breakdown: partner name, installation, commission percentage, calculated amount, payment method, transaction ID, and any notes attached to the record.
## Charts
Below the stat cards, two charts give you a visual overview of payout activity:
- **Monthly payout breakdown** — a bar chart showing total payout amounts by month, so you can spot trends over your selected date range.
- **Payment method distribution** — a pie chart breaking down how many transactions used each payment method (Bank Transfer, Check, PayPal, Stripe), with the percentage share listed below the chart.
---
## Configure menu access permissions per user
**URL:** https://docs.heyzack.ai/docs/crm/user-management/permissions
**Description:** Control which portal sections each Manager or Support user can see by enabling or disabling individual menu permissions when creating their account.
Menu permissions determine which sections of the Partner Portal sidebar a user can navigate to. When you create a Manager or Support account, only the menu items you explicitly check are visible to that user after they log in. Admin accounts always have access to every section, so permissions are not evaluated for them.
## Available permissions
Each checkbox in the Create User form maps to one menu section. The table below lists every permission key and the section it unlocks.
| Permission | Unlocks |
|-----------|---------|
| `dashboard` | Dashboard |
| `orders` | Orders |
| `sales_report` | Sales Report |
| `partners` | Partners |
| `installations` | Installations |
| `handymen` | Handymen |
| `leads` | Leads |
| `customers` | Customers |
| `chat` | Chat |
| `payments` | Payments |
| `activity_logs` | Activity Logs |
## Setting permissions when creating a user
Permissions are configured at the bottom of the **Create User** form in **Settings → Create User**.
## Admin override
Permissions only affect the **Manager** and **Support** roles.
## Updating permissions
Permissions are set at account creation time. The portal does not currently provide a form to update individual permissions on an existing account.
To change a user's menu access, delete the existing account and recreate it with the updated permission set.
---
## Create, edit, and delete portal user accounts
**URL:** https://docs.heyzack.ai/docs/crm/user-management/users-roles
**Description:** Learn how to create user accounts, assign Admin, Manager, or Support roles, edit roles, and remove users from the Heyzack CRM.
The Partner Portal lets you create internal user accounts for your team and control what each person can access. Each account is assigned one of three roles — Admin, Manager, or Support — which determines the level of access that user has across the portal.
## Creating a user
Go to **Settings** and select the **Create User** tab.
## Viewing all users
Go to **Settings** and select the **Manage Roles** tab. The tab displays a table of every user in the system with the following columns:
| Column | Description |
|--------|-------------|
| Name | The user's full name |
| Email | The user's email address |
| Role | Current role badge (Admin, Manager, or Support) |
| Status | Whether the account is active or inactive |
| Actions | Edit and Delete buttons |
Use the search bar at the top of the tab to filter users by name or email address.
## Editing a role
## Deleting a user
In the **Manage Roles** tab, click **Delete** next to the user you want to remove. A confirmation dialog appears before the account is permanently deleted.
## Available roles
| Role | Access |
|------|--------|
| Admin | Full access to all features |
| Manager | Access controlled by menu permissions |
| Support | Access controlled by menu permissions |
---
## GET /api/v1/chat/connections — list contacts
**URL:** https://docs.heyzack.ai/docs/crm/api/chat/connections
**Description:** Retrieve all users available to chat with in the Heyzack Partner Portal. Response shape adapts to your role — partner, handyman, or admin.
Use this endpoint to get the list of users available to chat with. You do not need to pass any query parameters—the API reads your authenticated role from your Bearer token and returns the appropriate set of contacts. Partners receive their connected handymen plus the admin. Handymen receive their connected partners plus the admin. Admins receive all partners and handymen on the platform.
## Endpoint
```
GET /api/v1/chat/connections
```
## Authentication
Bearer token required. See [Authentication](/api/authentication).
## Query parameters
None required. The endpoint derives your identity and role from your token.
## Example
```bash
curl "https:///api/v1/chat/connections" \
-H "Authorization: Bearer "
```
## Response by role
The shape of the `connections` array varies slightly by role. Partner and admin contacts include `availability_status` and `rating` fields on handyman entries.
```json
{
"data": {
"connections": [
{
"id": "partner_abc123",
"name": "John Doe",
"email": "john@example.com",
"image": "https://example.com/image.jpg",
"phone": "+1234567890"
},
{
"id": "partner_def456",
"name": "Jane Smith",
"email": "jane@example.com",
"image": null,
"phone": "+0987654321"
},
{
"id": "admin_xyz789",
"name": "Heyzack Admin",
"email": "admin@heyzack.ai",
"image": null,
"phone": null
}
],
"role": "handyman"
}
}
```
```json
{
"data": {
"connections": [
{
"id": "handyman_xyz456",
"name": "Mike Johnson",
"email": "mike@example.com",
"image": "https://example.com/image.jpg",
"phone": "+1122334455",
"availability_status": "Available",
"rating": "4.8"
},
{
"id": "handyman_abc789",
"name": "Sarah Williams",
"email": "sarah@example.com",
"image": null,
"phone": "+5566778899",
"availability_status": "Busy",
"rating": "4.9"
},
{
"id": "admin_xyz789",
"name": "Heyzack Admin",
"email": "admin@heyzack.ai",
"image": null,
"phone": null
}
],
"role": "partner"
}
}
```
```json
{
"data": {
"connections": [
{
"id": "partner_abc123",
"name": "John Doe",
"email": "john@example.com",
"image": "https://example.com/image.jpg",
"phone": "+1234567890"
},
{
"id": "partner_def456",
"name": "Jane Smith",
"email": "jane@example.com",
"image": null,
"phone": "+0987654321"
},
{
"id": "handyman_xyz456",
"name": "Mike Johnson",
"email": "mike@example.com",
"image": "https://example.com/image.jpg",
"phone": "+1122334455",
"availability_status": "Available",
"rating": "4.8"
},
{
"id": "handyman_abc789",
"name": "Sarah Williams",
"email": "sarah@example.com",
"image": null,
"phone": "+5566778899",
"availability_status": "Busy",
"rating": "4.9"
}
],
"role": "admin"
}
}
```
## Room ID format
When you open a conversation with a contact, the chat room ID is generated deterministically from the participant IDs. You will see this `roomId` returned in message and history responses.
| Conversation type | Room ID format | Example |
|-------------------|---------------|---------|
| Partner ↔ Handyman | `room_{sorted_id1}_{sorted_id2}` | `room_partner_abc123_handyman_xyz456` |
| Admin ↔ Partner | `room_admin_{partnerId}` | `room_admin_partner_abc123` |
| Admin ↔ Handyman | `room_admin_{handymanId}` | `room_admin_handyman_xyz456` |
---
## GET /api/v1/chat/history — retrieve messages
**URL:** https://docs.heyzack.ai/docs/crm/api/chat/history
**Description:** Fetch paginated, chronological message history between you and a specific partner, handyman, or admin using the Heyzack Partner Portal Chat API.
Use this endpoint to retrieve the message history for a conversation between you and another user. The response is paginated and sorted oldest-first, so page 1 contains the earliest messages in the conversation. Each message object includes sender information, making it straightforward to render a full conversation thread.
## Endpoint
```
GET /api/v1/chat/history
```
## Authentication
Bearer token required. See [Authentication](/api/authentication).
## Query parameters
## Example
```bash
curl "https:///api/v1/chat/history?partnerId=partner_abc123&page=1&limit=50" \
-H "Authorization: Bearer "
```
## Success response
Returns `200 OK`. The `data` object contains the full messages array, the room identifier, and a `pagination` object.
```json
{
"data": {
"messages": [
{
"id": "msg_123",
"message": "Welcome to Heyzack! How can we help you today?",
"messageType": "text",
"imageUrl": null,
"imageSize": null,
"createdAt": "2024-01-16T10:00:00.000Z",
"senderId": "admin_xyz789",
"senderName": "Heyzack Admin",
"senderRole": "admin"
},
{
"id": "msg_124",
"message": "I need help with my account settings.",
"messageType": "text",
"imageUrl": null,
"imageSize": null,
"createdAt": "2024-01-16T10:05:00.000Z",
"senderId": "partner_abc123",
"senderName": "John Doe",
"senderRole": "partner"
},
{
"id": "msg_125",
"message": null,
"messageType": "image",
"imageUrl": "https://storage.example.com/chat/image.jpg",
"imageSize": "{\"fileSize\":123456,\"mimeType\":\"image/jpeg\"}",
"createdAt": "2024-01-16T10:10:00.000Z",
"senderId": "admin_xyz789",
"senderName": "Heyzack Admin",
"senderRole": "admin"
}
],
"roomId": "room_admin_partner_abc123",
"pagination": {
"page": 1,
"limit": 50,
"total": 3,
"hasNext": false
}
}
}
```
## Pagination
Responses include a `pagination` object with `page`, `limit`, `total`, and `hasNext`. To load older messages use a higher page number. When `hasNext` is `false`, you have reached the most recent page of messages.
Messages are always returned in chronological order — oldest first within each page.
---
## POST /api/v1/chat/send — send a chat message
**URL:** https://docs.heyzack.ai/docs/crm/api/chat/send-message
**Description:** Send a text message to a partner, handyman, or admin using the Heyzack Chat API. Exactly one recipient ID must be provided per request.
Use this endpoint to send a text message from your authenticated account to another user in the Heyzack network. The recipient is identified by exactly one of `handymanId`, `partnerId`, or `adminId`, depending on the direction of the conversation. Partner–handyman messaging requires that the two users are connected through a job or installation.
## Endpoint
```
POST /api/v1/chat/send
```
## Authentication
Bearer token required. See [Authentication](/api/authentication).
## Request body
## Examples
## Success response
Returns `200 OK` with the created message object nested under `data`.
```json
{
"message": "Message sent successfully",
"data": {
"id": "msg_123456",
"roomId": "room_admin_partner_abc123",
"senderId": "user_abc123",
"message": "I need help with my account settings.",
"messageType": "text",
"createdAt": "2024-01-16T10:30:00.000Z"
}
}
```
## Error responses
| Status | Error message | Cause |
|--------|---------------|-------|
| 400 | `"partnerId, handymanId, or adminId is required"` | No recipient ID was provided |
| 400 | `"Admin can only chat with either partner or handyman, not both"` | Admin provided more than one recipient ID |
| 400 | `"Invalid recipient role"` | The recipient ID does not match a valid role |
| 403 | `"Handyman and partner are not connected"` | The handyman and partner are not linked through a job or installation |
| 404 | `"Recipient user not found"` | No user exists with the given ID |
| 500 | `"Internal server error"` | An unexpected error occurred on the server |
---
## POST /api/v1/chat/upload-image — send an image
**URL:** https://docs.heyzack.ai/docs/crm/api/chat/upload-image
**Description:** Upload a JPEG, PNG, WebP, or GIF image and send it as a chat message to a partner, handyman, or admin via the Heyzack Partner Portal API.
Use this endpoint to upload an image file and send it as a message in a chat conversation. The request uses `multipart/form-data` instead of JSON, so you include the image binary alongside the recipient ID as form fields. The server stores the image and returns a URL you can use to display it.
## Endpoint
```
POST /api/v1/chat/upload-image
```
## Authentication
Bearer token required. See [Authentication](/api/authentication).
## Request format
`multipart/form-data` — do not set `Content-Type: application/json` for this endpoint. Your HTTP client or library will set the correct multipart content type automatically when you attach a file.
## Supported formats
JPEG, PNG, WebP, GIF.
## Form fields
## Example
```bash
curl -X POST "https:///api/v1/chat/upload-image" \
-H "Authorization: Bearer " \
-F "image=@/path/to/image.jpg" \
-F "handymanId=handyman_xyz456"
```
## Success response
Returns `200 OK` with the created message object nested under `data`.
```json
{
"message": "Image uploaded and sent successfully",
"data": {
"id": "msg_123456",
"roomId": "room_admin_handyman_xyz456",
"senderId": "user_xyz456",
"messageType": "image",
"imageUrl": "https://storage.example.com/chat/image.jpg",
"imageSize": "{\"fileSize\":123456,\"mimeType\":\"image/jpeg\"}",
"createdAt": "2024-01-16T10:30:00.000Z"
}
}
```
## Error responses
| Status | Error message | Cause |
|--------|---------------|-------|
| 400 | `"partnerId, handymanId, or adminId is required"` | No recipient ID was provided |
| 400 | `"Admin can only chat with either partner or handyman, not both"` | Admin provided more than one recipient ID |
| 400 | `"Invalid recipient role"` | The recipient ID does not match a valid role |
| 403 | `"Handyman and partner are not connected"` | The handyman and partner are not linked through a job or installation |
| 404 | `"Recipient user not found"` | No user exists with the given ID |
| 500 | `"Internal server error"` | An unexpected error occurred on the server |
---
## Links
- [Support](mailto:heyzackai@gmail.com)