
Get started
Roles and permissions in the CRM
Learn how Admin, Manager, and Support roles work in the Heyzack CRM, and how to control which menu sections each user can access.
The CRM uses a role-based access system to control what each user can see and do. There are three roles — Admin, Manager, and Support — and for Manager and Support users you can fine-tune access by enabling or disabling individual menu items. This lets you give team members exactly the access they need without exposing unrelated parts of the CRM.
Roles
| Role | Description |
|---|---|
| Admin | Full access to all features; ignores permission restrictions |
| Manager | Configurable access; permissions assigned at account creation |
| Support | Configurable access; permissions assigned at account creation |
Note
Admins always have access to all features regardless of which menu permissions are selected.
Menu permissions
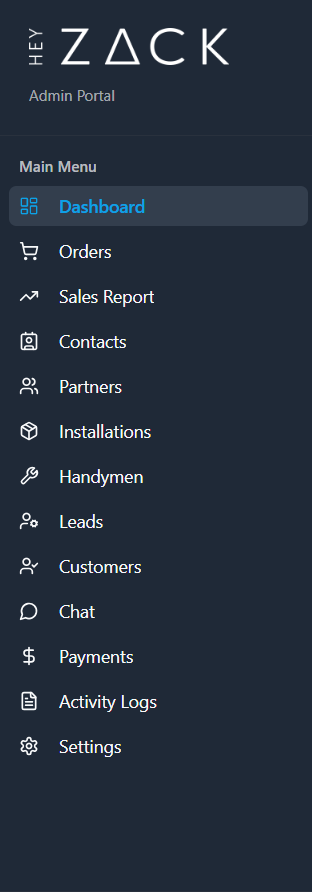
Each Manager and Support user has a set of menu permissions that controls which sections of the CRM appear in their sidebar. You can enable or disable any of the following menu items per user:
| Menu item | Description |
|---|---|
| Dashboard | Overview and summary metrics |
| Orders | View and manage customer orders |
| Sales Report | Revenue and sales analytics |
| Contacts | Contact records |
| Partners | Partner management |
| Installations | Smart home installation tracking |
| Handymen | Technician management |
| Leads | Lead tracking and pipeline |
| Customers | Customer records |
| Chat | Messaging between CRM users and field contacts |
| Payments | Payment records and transaction history |
| Activity Logs | Audit trail of CRM activity |
| Settings | User management and account settings |
If a user has no permissions assigned (empty permissions list), the CRM treats them as having full access and shows all menu items.
Changing roles
To update a user's role after they have been created:
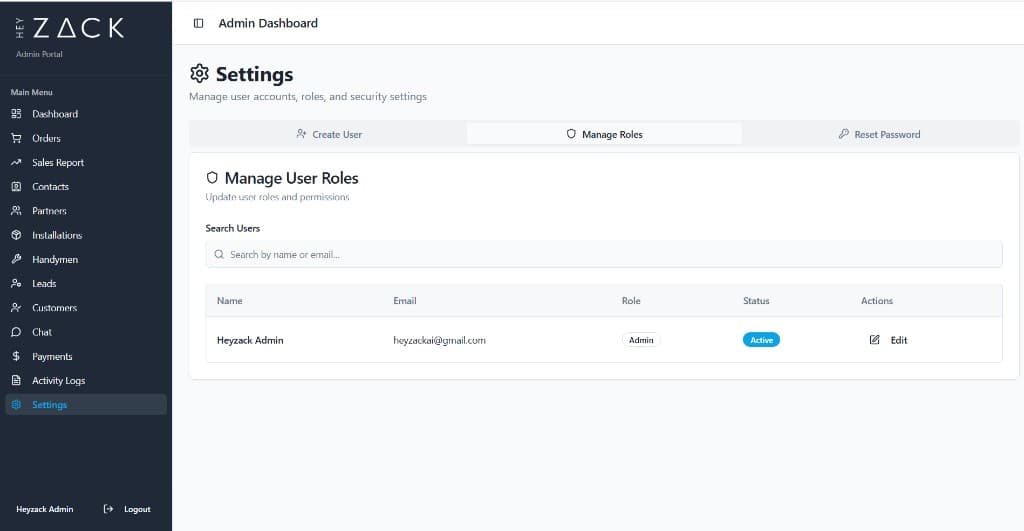
Go to Settings
Navigate to Settings in the sidebar.
Open Manage Roles
Click the Manage Roles tab.
Find the user
Use the search box to find the user by name or email.
Edit the role
Click Edit on the user's row. Select the new role from the dropdown, then save.
Creating users
To add a new user to the CRM:
Go to Settings
Navigate to Settings in the sidebar.
Open Create User
Click the Create User tab.
Fill in the user details
Enter the user's full name, email address, and a secure password. Then select a role — Admin, Manager, or Support.
Assign menu permissions
Check each menu item you want the user to be able to access. Use Select All to enable every item at once. For Admin users, these selections have no effect — Admins always see everything.
Create the user
Click Create User to save. The new user can now log in with the credentials you set.

Tip
If you want to give a new Manager or Support user access to every menu item, use the Select All checkbox rather than ticking each item individually.