
Get started
Create, edit, and delete portal user accounts
Learn how to create user accounts, assign Admin, Manager, or Support roles, edit roles, and remove users from the Heyzack CRM.
The Partner Portal lets you create internal user accounts for your team and control what each person can access. Each account is assigned one of three roles — Admin, Manager, or Support — which determines the level of access that user has across the portal.
Creating a user
Go to Settings and select the Create User tab.
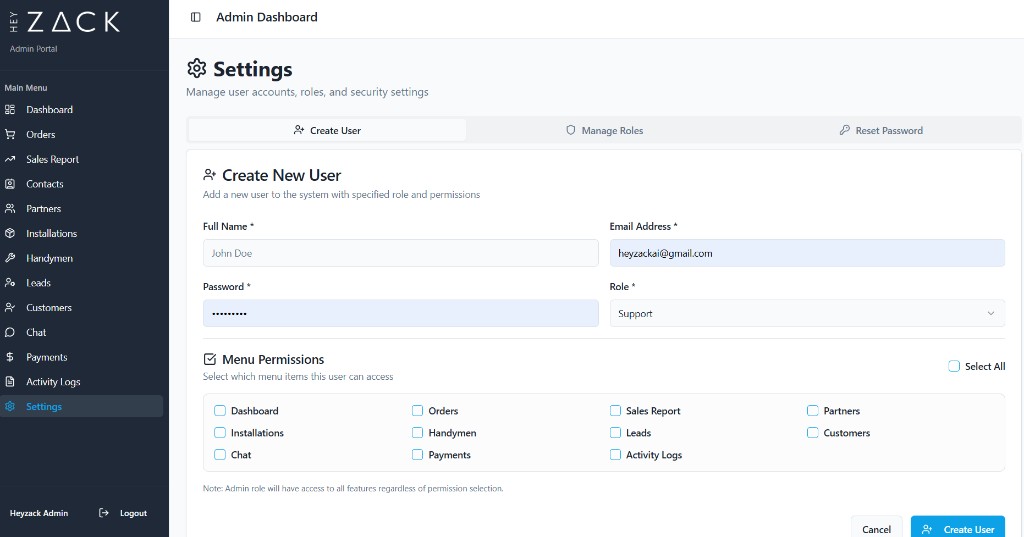
Fill in the user's details
Complete the required fields:
- Full Name — the user's display name across the portal
- Email Address — used to log in and receive system notifications
- Password — set an initial secure password for the account
Select a role
Choose one of the three available roles from the Role dropdown:
- Admin — full access to all features; menu permission checkboxes have no effect for this role
- Manager — access is limited to whichever menu items you grant
- Support — access is limited to whichever menu items you grant
Note
If you assign the Admin role, the user will have access to every section of the portal regardless of which permission checkboxes you select.
Set menu permissions
At the bottom of the form, check each menu item you want the user to access. Use the Select All checkbox to grant every permission at once.
Permissions only apply to Manager and Support roles. See Configure menu permissions for the full list of available items.
Submit the form
Click Create User. The new account is immediately active and the user can log in straight away.
Viewing all users
Go to Settings and select the Manage Roles tab. The tab displays a table of every user in the system with the following columns:
| Column | Description |
|---|---|
| Name | The user's full name |
| The user's email address | |
| Role | Current role badge (Admin, Manager, or Support) |
| Status | Whether the account is active or inactive |
| Actions | Edit and Delete buttons |
Use the search bar at the top of the tab to filter users by name or email address.
Editing a role
Locate the user
Find the user in the table on the Manage Roles tab. Use the search bar to filter if needed.
Click Edit
Click the Edit button next to the user. An update form appears below the table with the user pre-selected.
Select the new role
Choose the new role from the New Role dropdown.
Save the change
Click Update Role. The change takes effect immediately.
Deleting a user
In the Manage Roles tab, click Delete next to the user you want to remove. A confirmation dialog appears before the account is permanently deleted.
Warning
You cannot delete your own account. The Delete button is hidden for the currently logged-in user.
Available roles
| Role | Access |
|---|---|
| Admin | Full access to all features |
| Manager | Access controlled by menu permissions |
| Support | Access controlled by menu permissions |
Tip
Use the Manager role for team leads who need broad access, and the Support role for agents who only need access to a specific subset of the portal such as Leads or Chat.